
7 Winter Paper Crafts for Cozy Family Afternoons
· Craftiverse Editorial Team
Seven fully illustrated winter craft tutorials, a combined supply checklist, and a flexible plan for making paper penguins, snowy scenes, stars, and trees together.
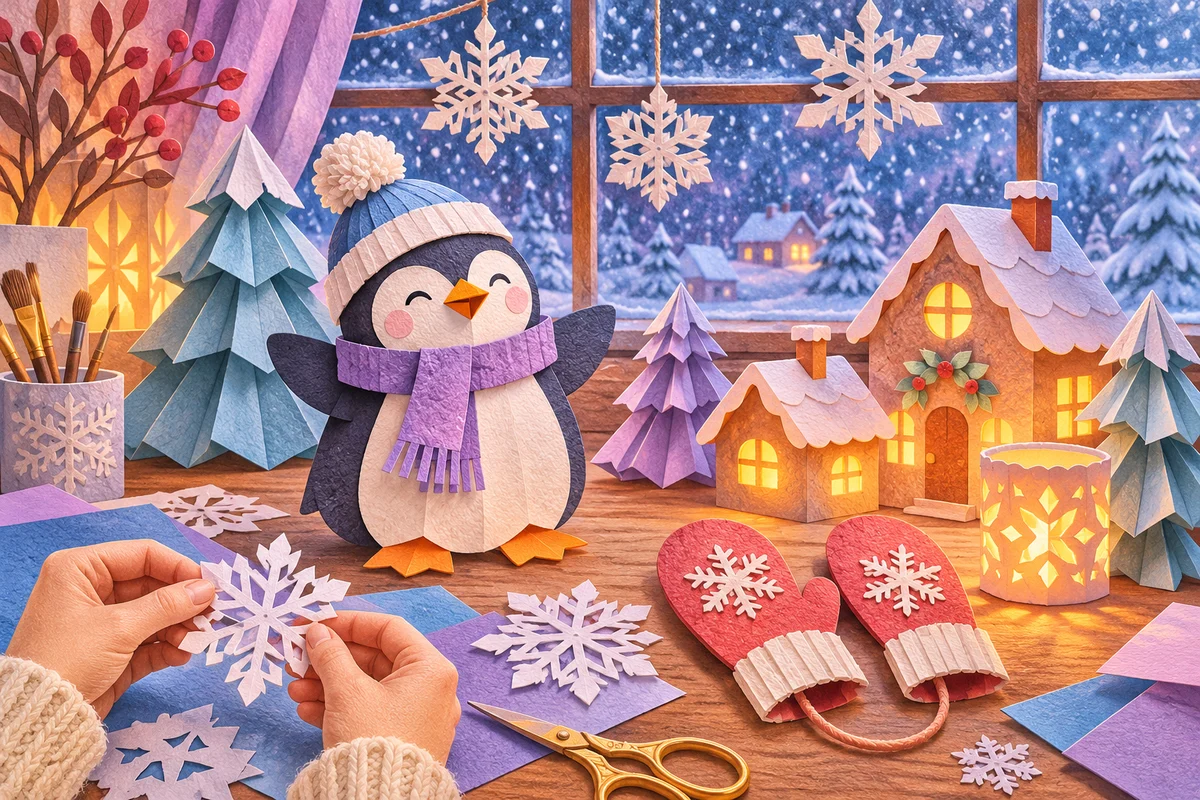
Illustration created for Craftiverse; the scene is illustrative.
Cut-paper penguin
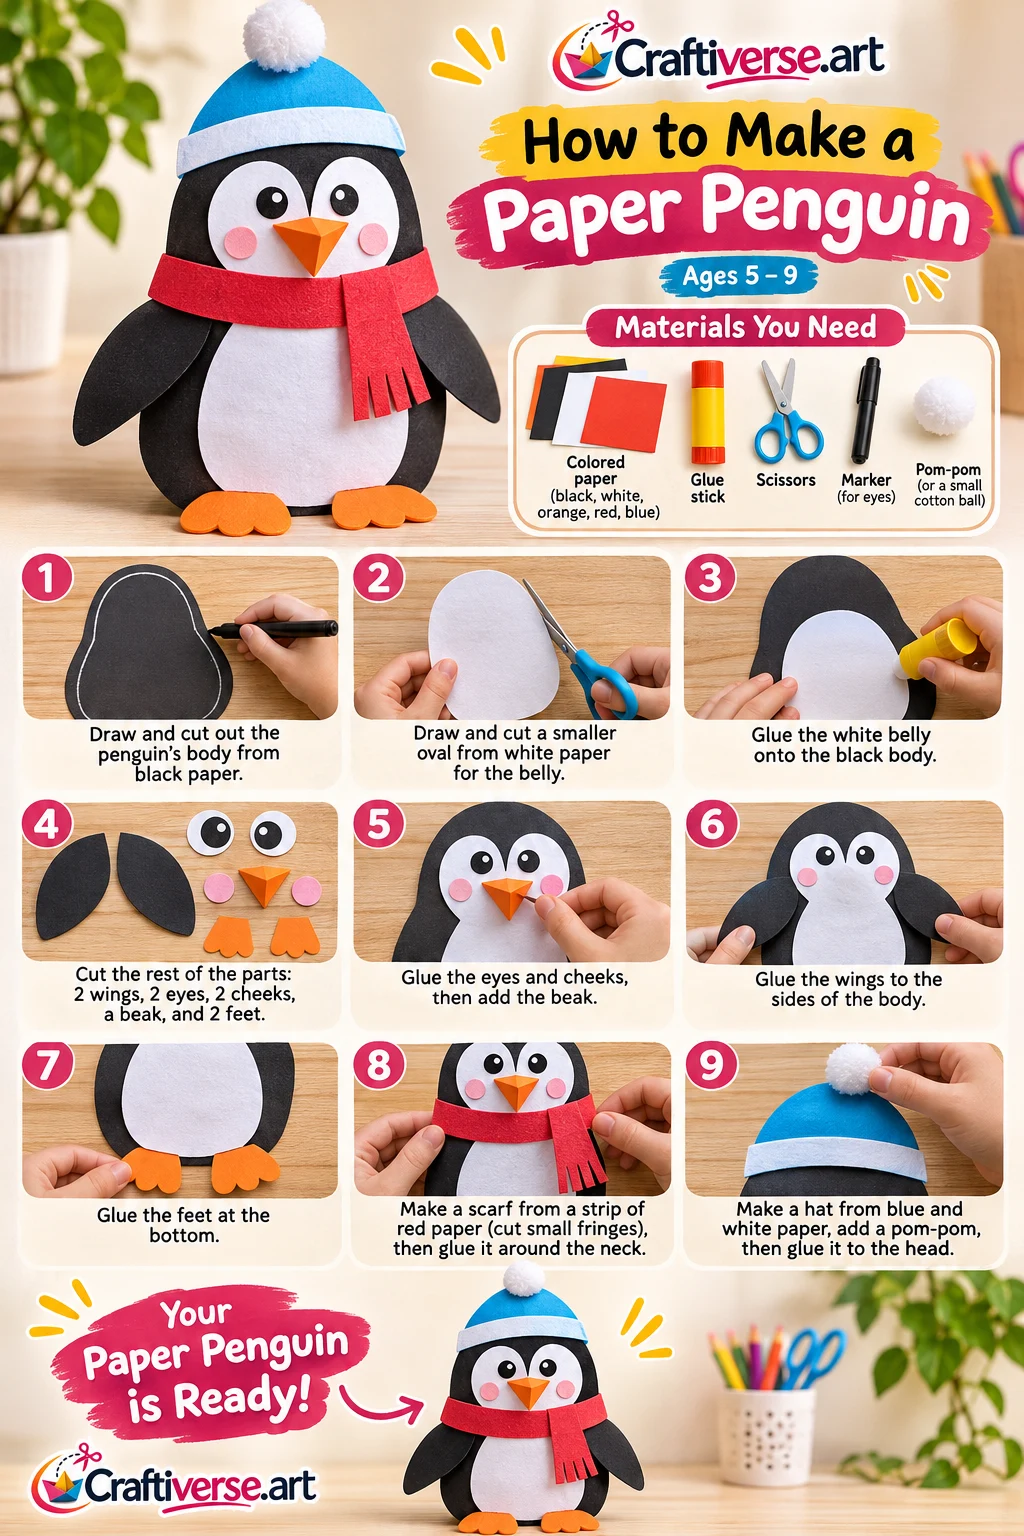
Materials
- Black, white, orange and colored paper
- Scissors
- Glue
- Marker
How to make it
- Cut a black body and wings and a white oval belly.
- Glue the belly and wings to the body.
- Cut and attach an orange beak and feet and add paper eyes.
- Add a paper scarf and hat.
Fold-and-cut paper snowflake
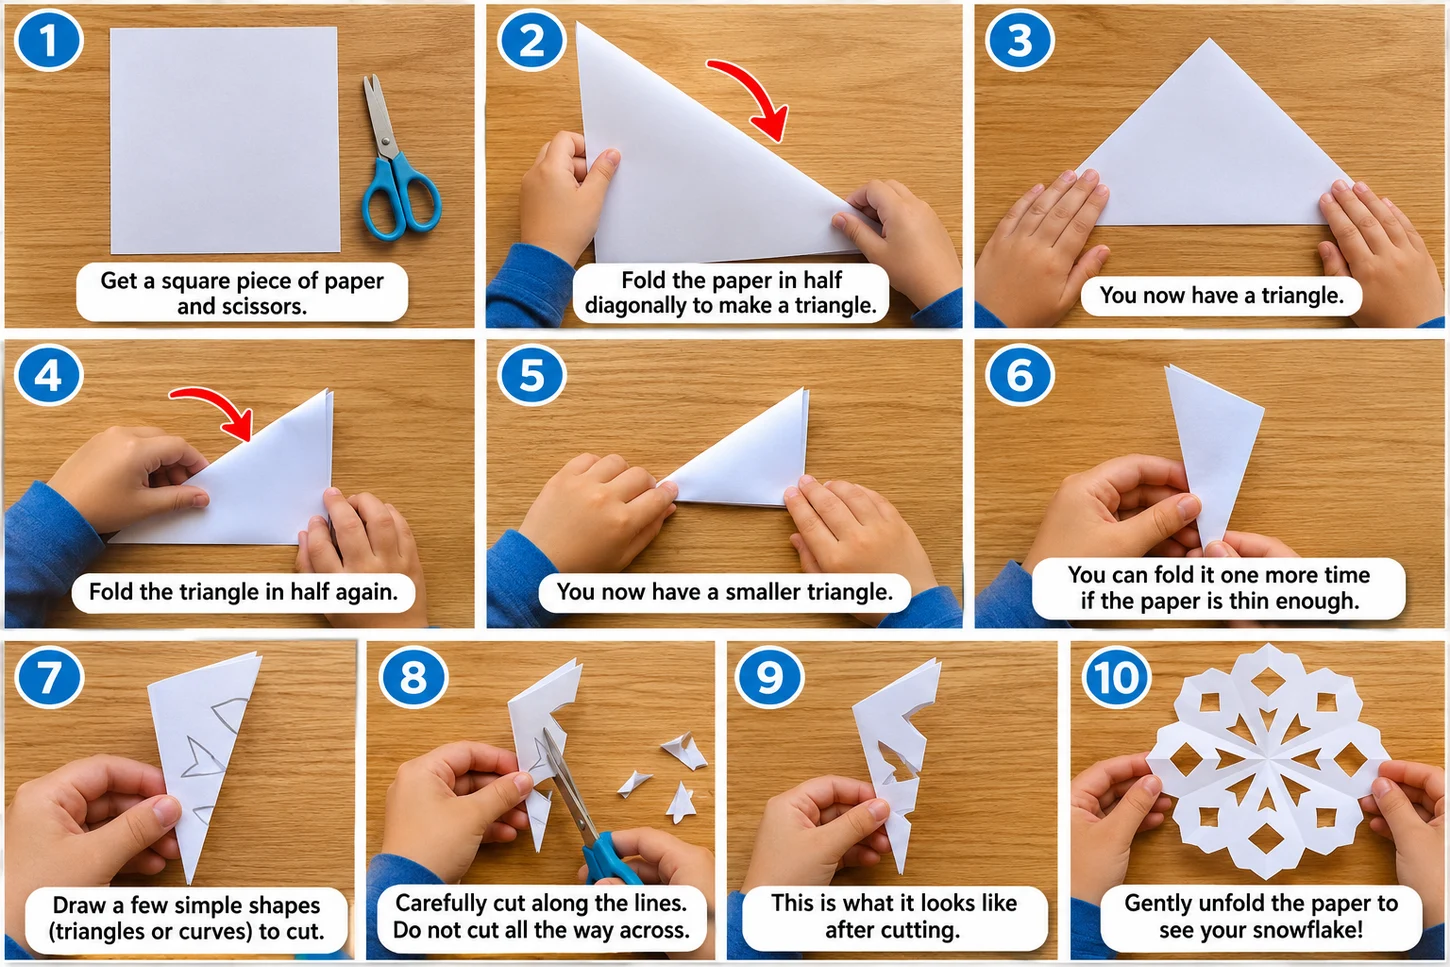
Materials
- Square paper
- Pencil
- Scissors
How to make it
- Fold the square diagonally into a triangle.
- Fold the triangle in half twice more.
- Draw small shapes along the folded edges and cut them out, leaving some of each edge intact.
- Open the paper carefully to reveal the snowflake.
Paper house collage
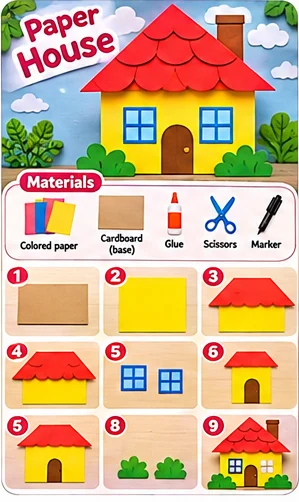
Materials
- Cardstock
- Colored paper
- Scissors
- Glue
- Marker
How to make it
- Cut a large rectangle for the wall and a triangle for the roof.
- Glue the shapes to cardstock and add a chimney.
- Cut a door and windows and glue them to the house.
- Add paper roof tiles, clouds and plants.
Paper handprint tree
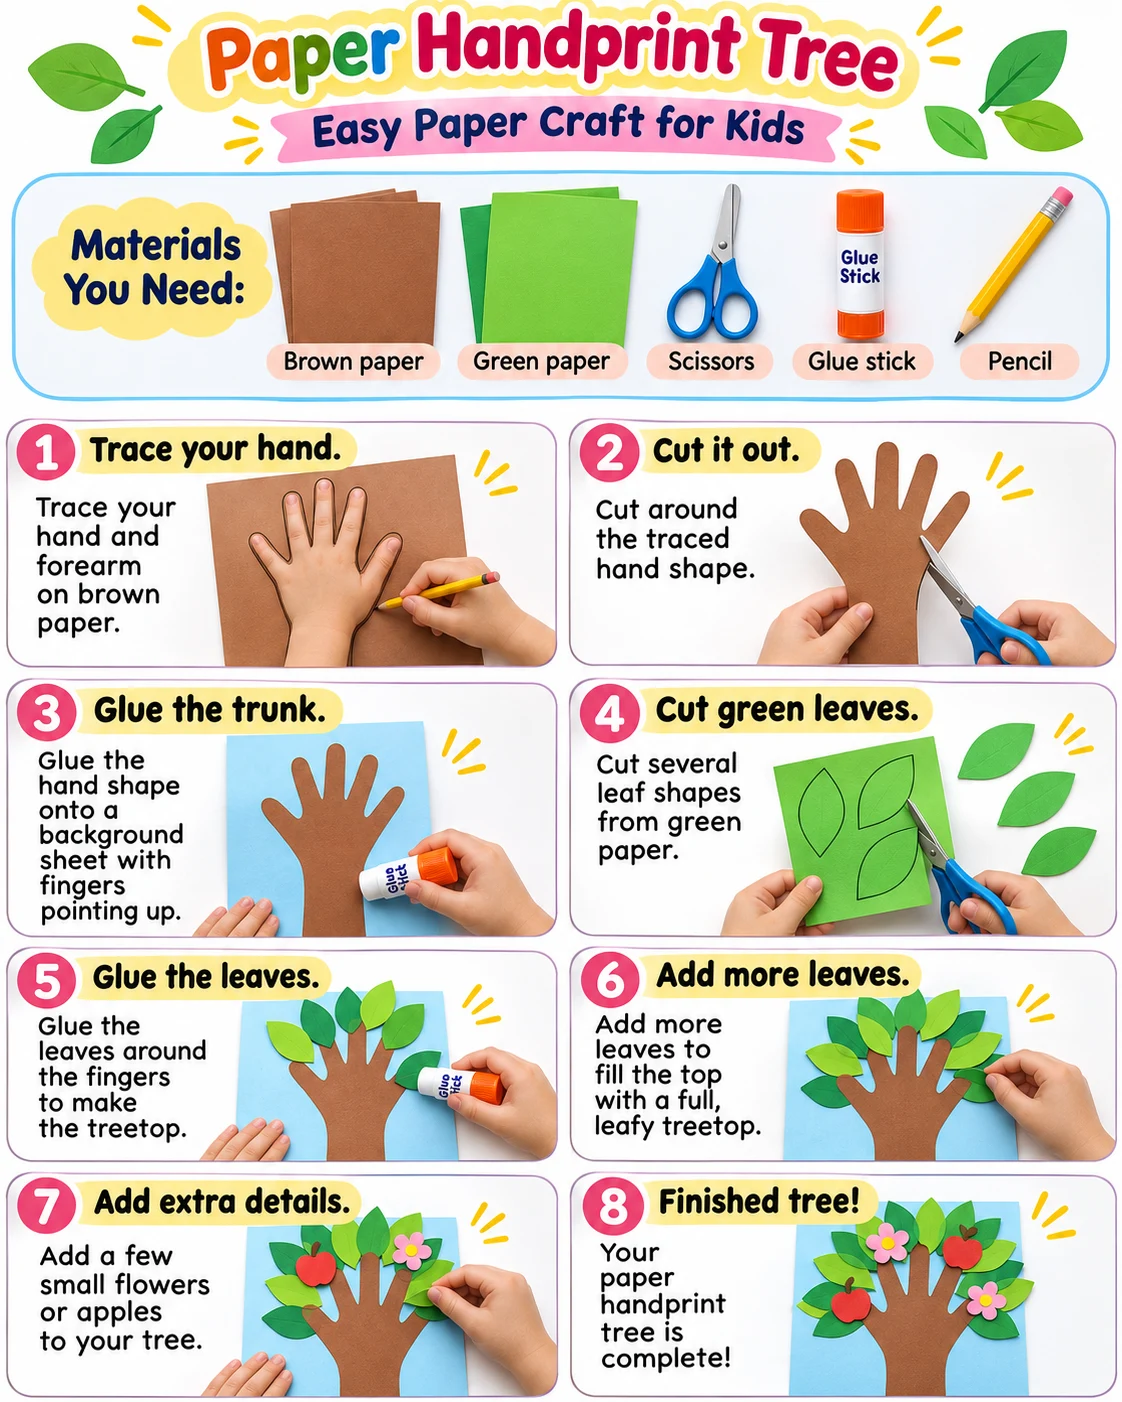
Materials
- Brown and green paper
- Background paper
- Scissors
- Glue
- Pencil
How to make it
- Trace your hand and wrist on brown paper and cut out the shape.
- Glue it to the background with the wrist at the bottom.
- Cut green leaves and glue them around the fingers.
- Add more leaves and small paper flowers if you like.
Hanging paper stars
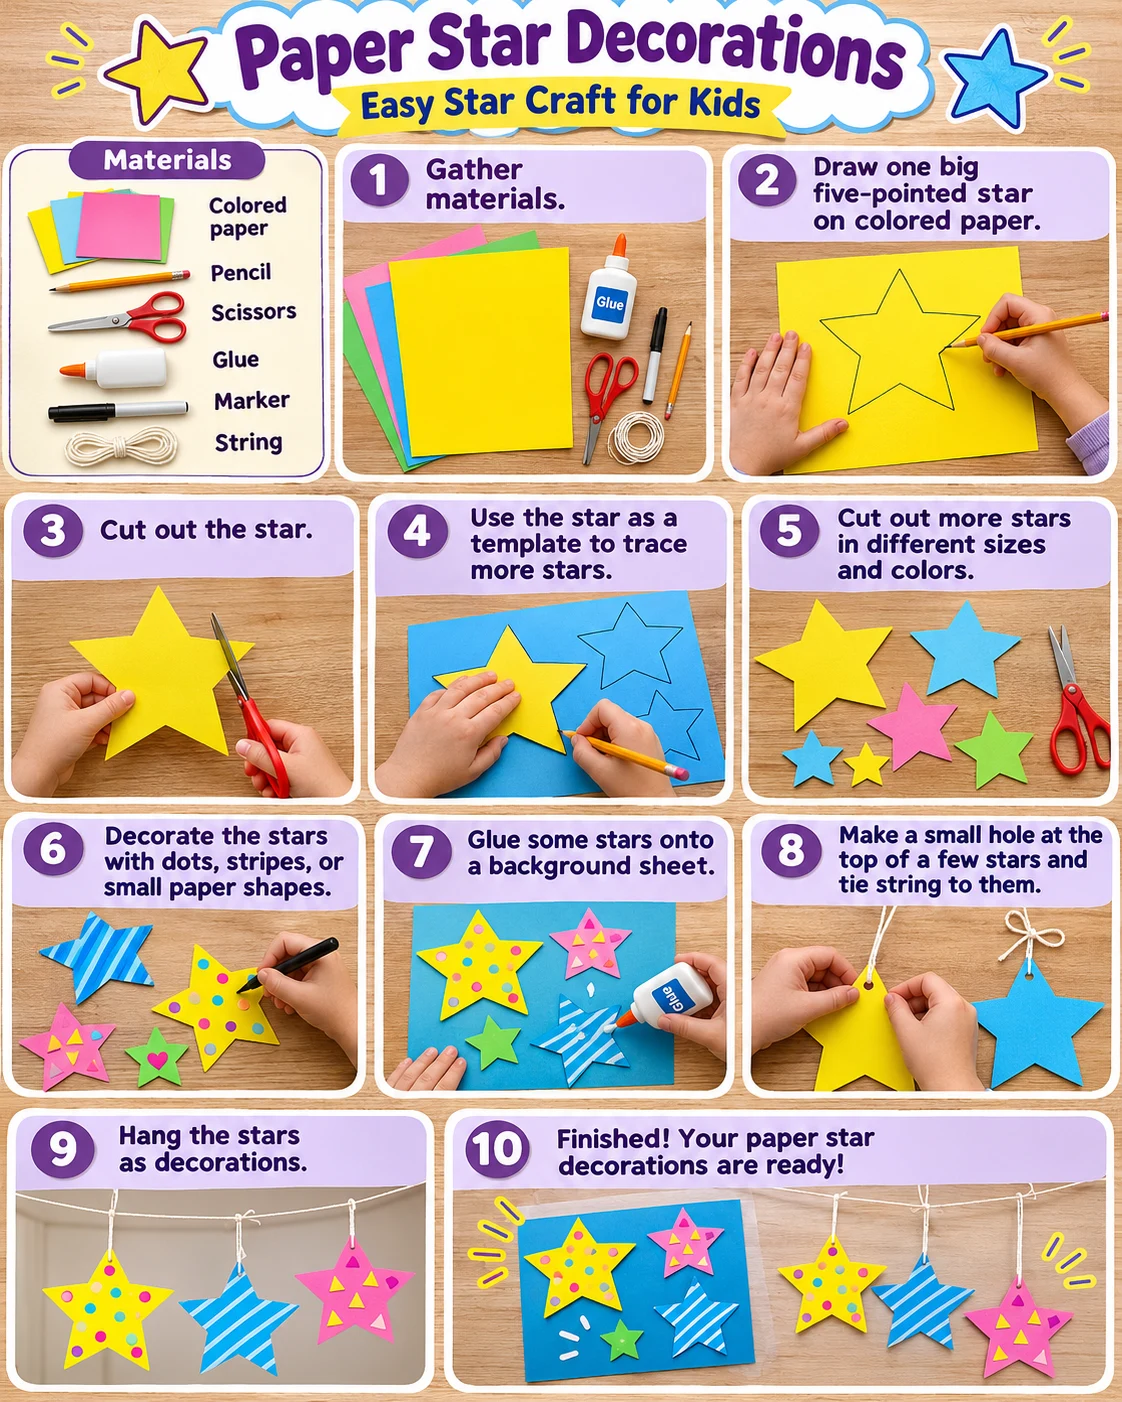
Materials
- Colored cardstock
- Pencil
- Scissors
- Glue
- Marker
- String
- Tape
How to make it
- Draw and cut out a large star.
- Use it as a template to make more stars.
- Decorate each star with paper shapes or marker lines.
- Tape string to the back of each star and hang them where they can turn freely.
Layered paper Christmas tree
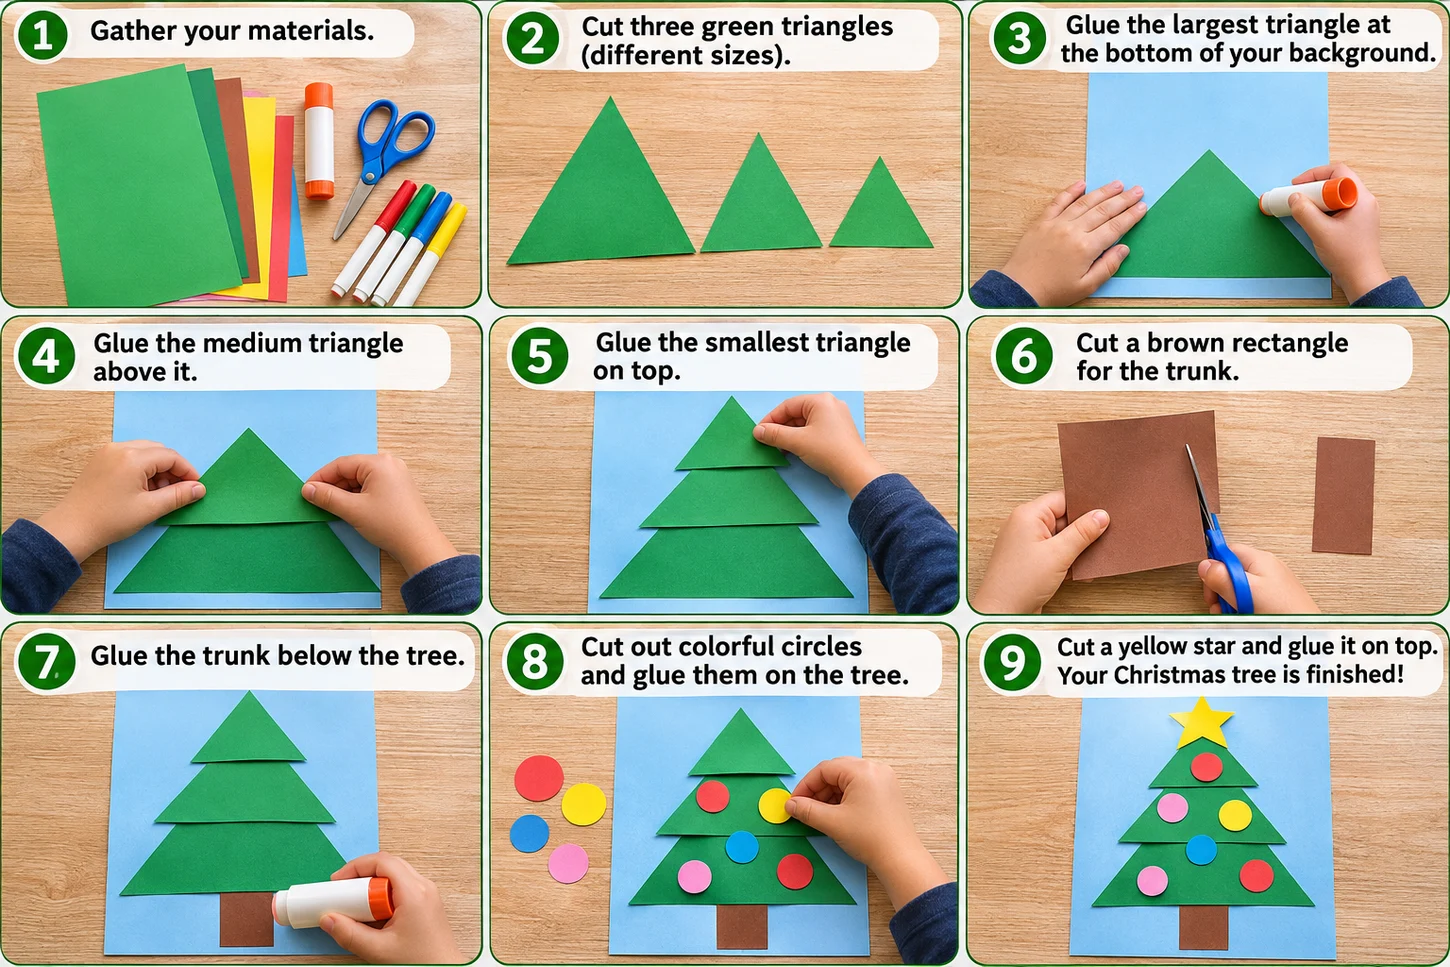
Materials
- Green, brown and colored paper
- Background paper
- Scissors
- Glue
How to make it
- Cut three green triangles in different sizes and a brown rectangle for the trunk.
- Glue the trunk near the bottom of the background.
- Layer the triangles from largest to smallest so their points rise above each other.
- Add paper ornaments and a star at the top.
Paper bag penguin puppet
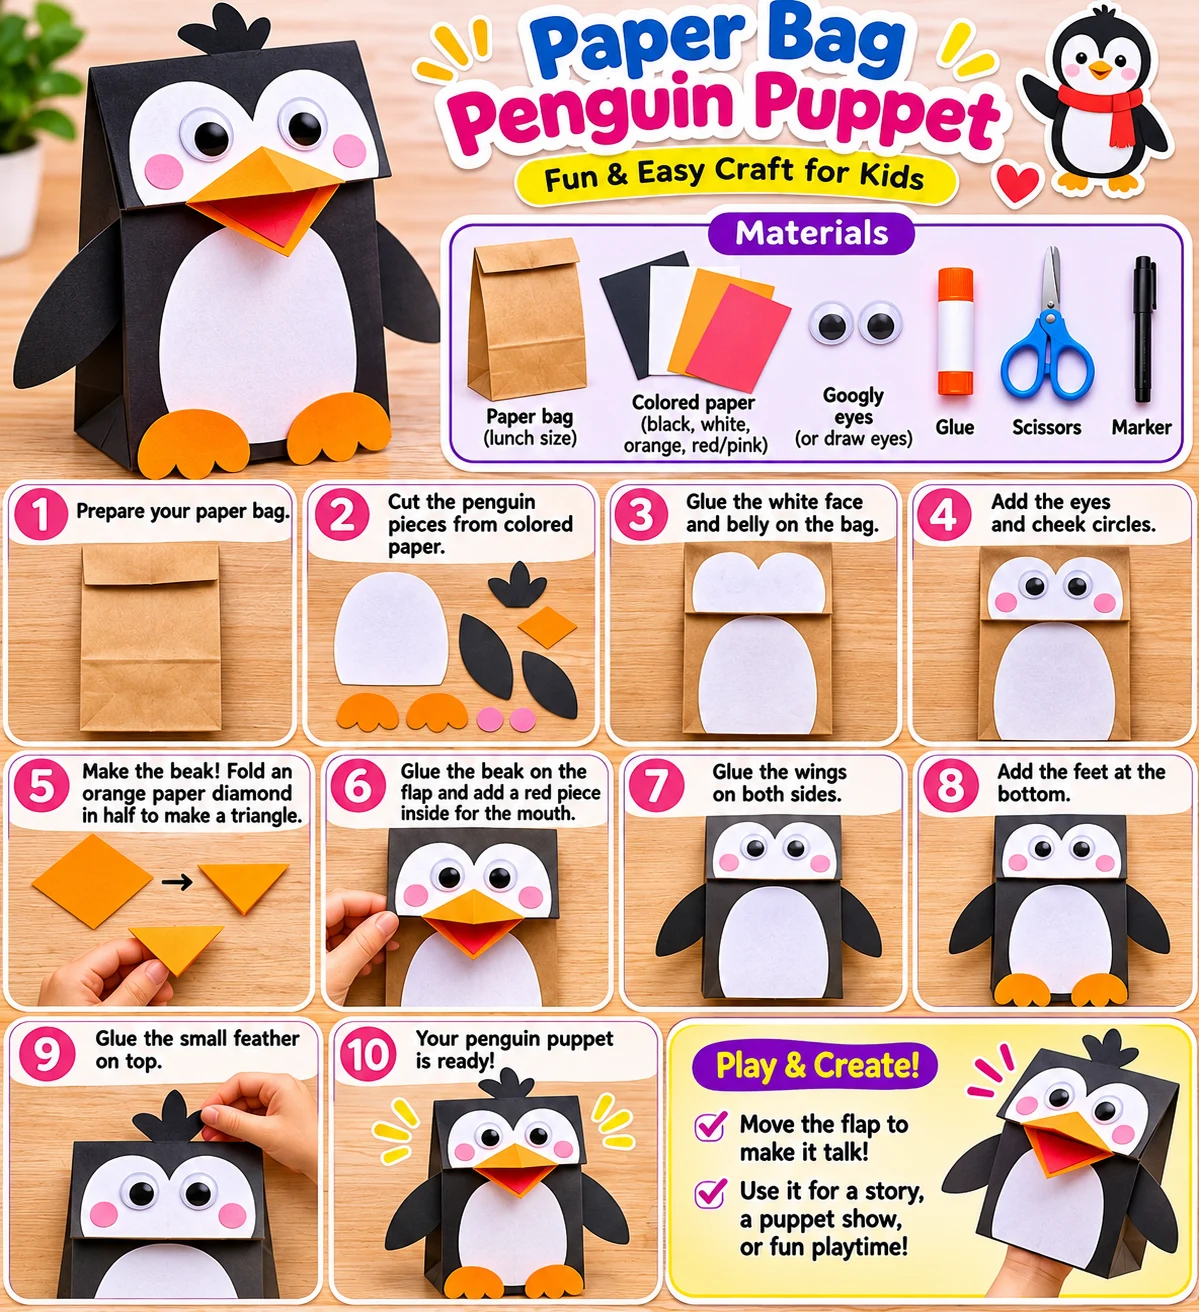
Materials
- Paper lunch bag
- Black, white and orange paper
- Scissors
- Glue
- Marker
How to make it
- Lay the bag flat with the bottom flap facing you.
- Cover the flap and body in black paper, keeping the fold clear.
- Cut a white belly, two wings and orange feet and attach them.
- Glue the eyes and beak to the flap, then slip your hand inside to make it move.
Make a winter invitation that fits your day
These are indoor craft ideas for a snowy afternoon, a cold evening, or simply a winter-themed story. Choose the project that interests your family, even if your local winter is warm or dry. You do not need real snow, artificial snow products, or a perfect seasonal display.
The seven tutorials offer different experiences: a flat collage, folding and cutting, a puppet for play, and paper decorations. Pick one and test any unfamiliar construction before offering it to a child. A short session with an unfinished creation can be a better fit than trying to complete a whole winter village.
Combined supply checklist
- Black, white, orange, green, brown, yellow, and other colored paper; scraps can cover small details.
- A few background sheets or lightweight cardstock for scenes and stars.
- Clean paper lunch bags if choosing the bag-penguin puppet.
- Pencil, suitable markers, glue stick, and suitable scissors with supervision.
- Tape and string only if choosing the hanging-star version; a flat display avoids these.
- A clear work surface, a drying area, and a folder or shallow box for saved projects.
Reuse the same supplies across sessions
Make a paper penguin first, then use leftover white scraps on a house picture another day. Save larger green offcuts for trees and colored scraps for scarves or windows. Keeping useful pieces in one envelope is easier than leaving all the supplies out.
The combined list is for choosing among projects, not an exact shopping quantity. Check the selected tutorial before starting. Draw details you cannot cut easily and substitute a drawn background for a second construction task.
Three small sessions instead of seven projects
For a first session, make a character: choose a penguin or puppet. Next time, create a place with houses or trees. On another day, add a snowflake or stars, or simply play with what you already made. There is no required order and no need to make both penguin versions.
If different children want different activities, use the same paper colors but give them separate work areas. An older child can add small details without being responsible for a younger child’s cutting or safety.
Keep decorations and materials practical
Use paper details instead of loose glitter or tiny decorations when those are unsuitable. Check product labels and keep craft materials out of mouths. Allow glue to set according to its label before lifting the work. Adults should handle difficult multi-layer cutting rather than asking a child to push harder.
Choose a display spot away from heat, flames, and anything needed for safe movement. Keep string decorations out of reach where they could pose an entanglement risk. A flat picture in a folder is an equally good way to keep a craft.
Use the printable to choose, not to track a streak
The winter sheet lets you mark one craft, gather supplies, and note a simpler version. Your child can choose a different color scheme or skip a seasonal detail. There is no need to finish the sheet or photograph each project.
At the end, ask which creation should be saved and which scraps can become something else. If you want another family session, let the choice come from what they enjoyed rather than from a list of unfinished tasks.
Common questions
Do we need to make all seven?
No. The article is a choice of seven tutorials. One character and one setting can be plenty.
Are the crafts all Christmas-themed?
No. Penguins, snowflakes, houses, and winter trees can be enjoyed without holiday themes. The layered Christmas tree tutorial includes an optional evergreen adaptation.
What if my child cannot cut folded snowflakes?
An adult can make difficult cuts, or the child can draw a snowflake or tear paper for a snow scene instead.
Sources & editorial notes
The resources below inform the general approach. The activity instructions, sample words, and planning tables are original Craftiverse suggestions; they have not been clinically evaluated.
- American Academy of Pediatrics: Choosing Safe Art & Craft Supplies
Background on choosing suitable craft materials. Project quantities, timing examples, and adaptations are Craftiverse planning suggestions.
Written by the Craftiverse Editorial Team · Published 21 November 2026. This article has not been reviewed by a clinician. Read our about page or contact us about a correction.
Plan more flexible family making sessions