
7 Paper Animal Crafts That Turn Into Storytelling Games
· Craftiverse Editorial Team
Make seven paper animals with full illustrated tutorials, then use character prompts and simple games to create stories together. Includes printable story cards.
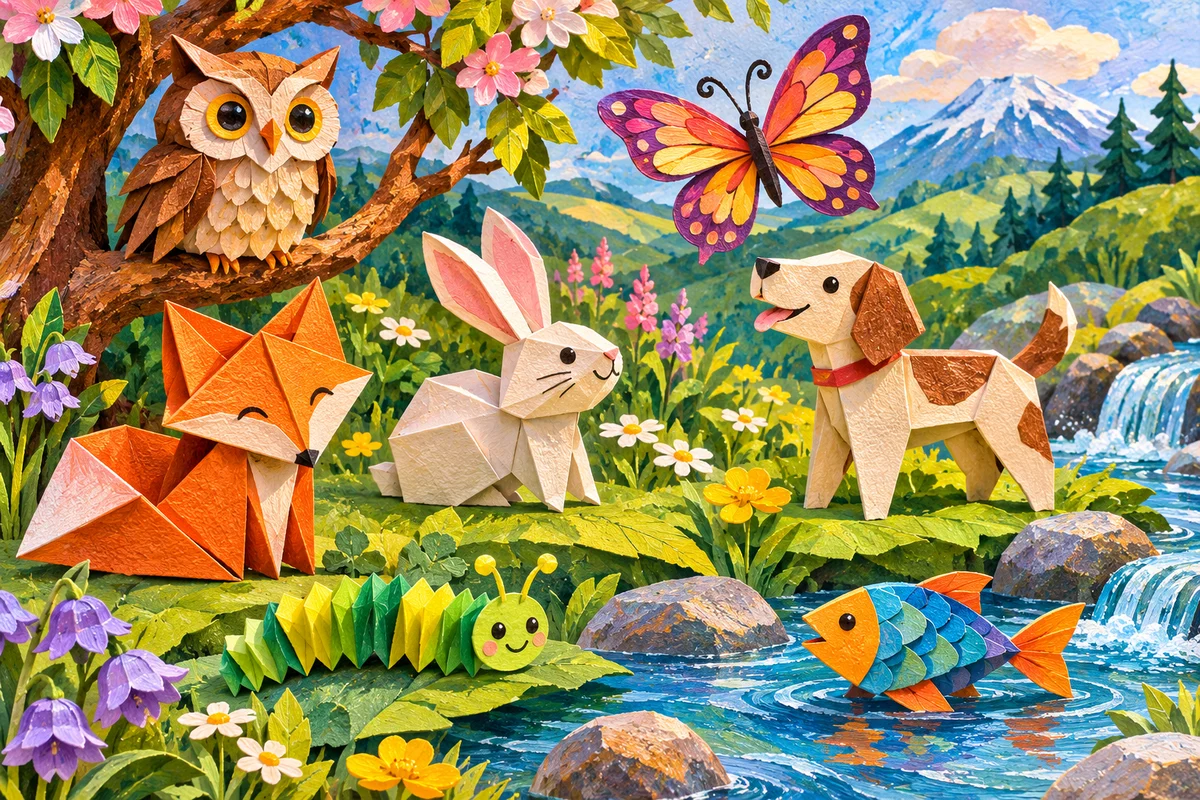
Illustration created for Craftiverse; the scene is illustrative.
Folded paper fox face
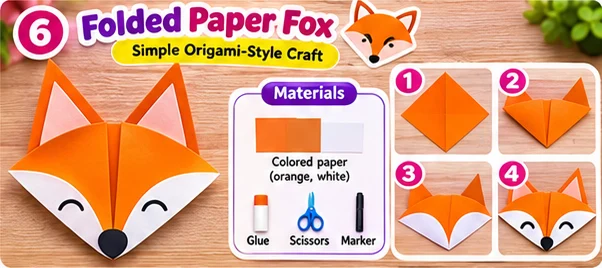
Materials
- Square orange paper
- White paper
- Scissors
- Glue
- Marker
How to make it
- Fold the orange square diagonally into a triangle.
- Hold it with the point down. Fold the side corners upward to form pointed ears.
- Cut two white cheek shapes and glue them along the lower edges.
- Draw closed eyes and add a dark nose at the bottom point.
Paper circle caterpillar
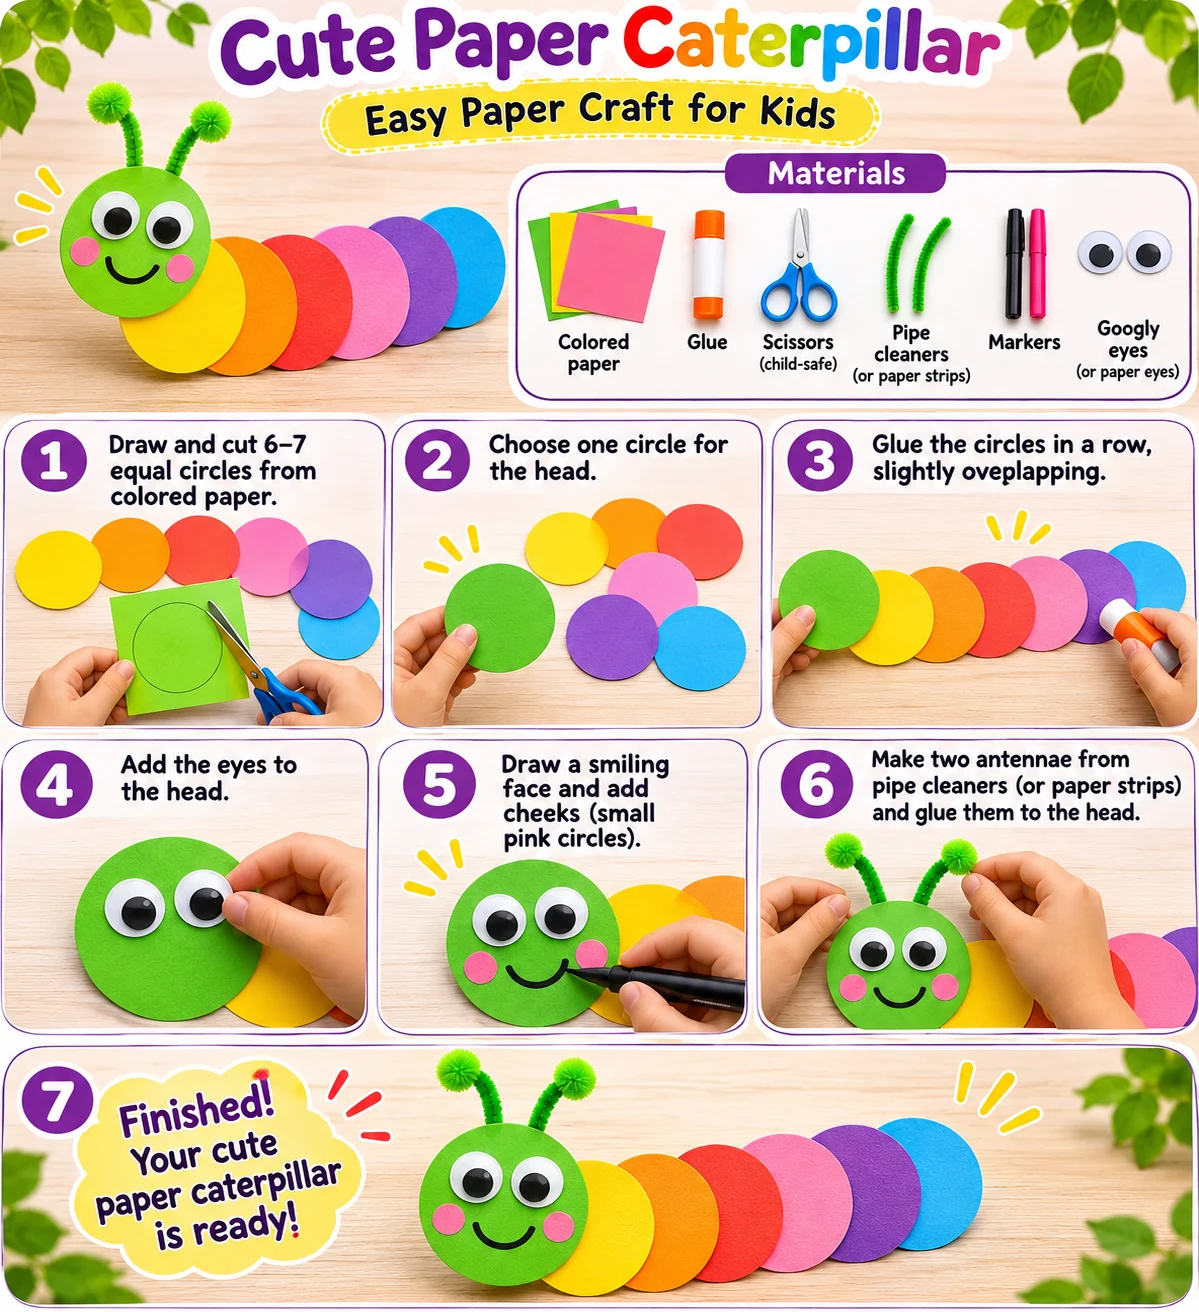
Materials
- Colored paper
- Scissors
- Glue
- Marker
- Paper eyes
How to make it
- Cut six or seven circles in different colors and another circle for the head.
- Overlap and glue the circles in a gently curved row.
- Add eyes and draw a smile on the head.
- Glue the head to the front and add paper antennae.
Colorful paper fish
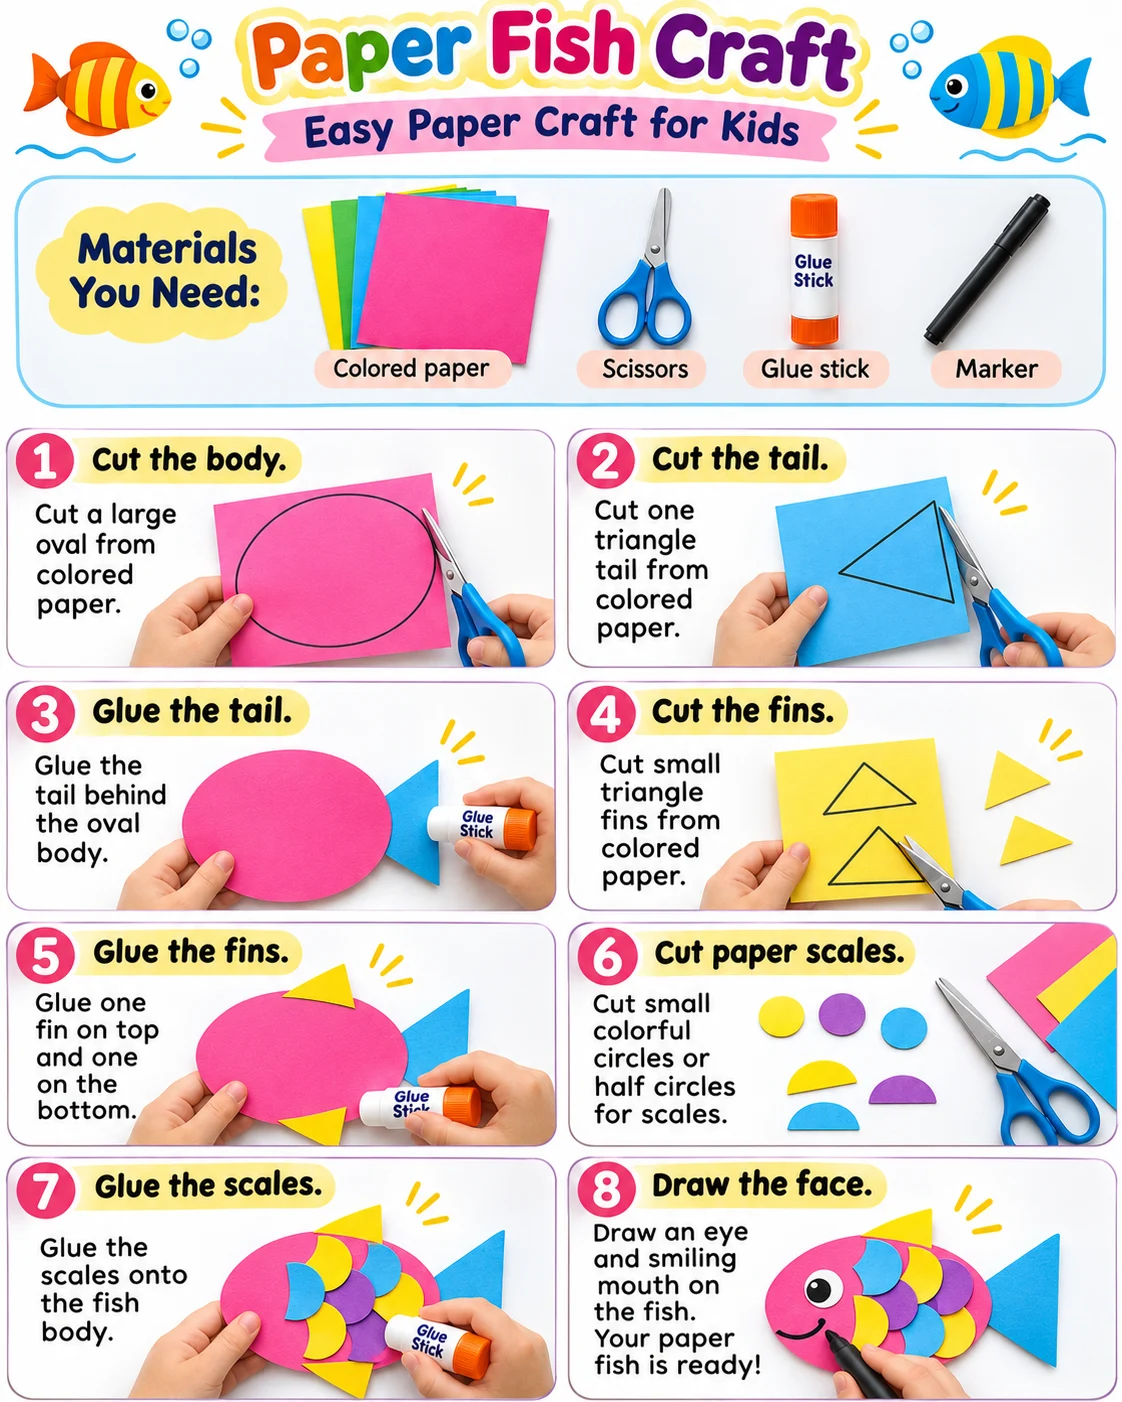
Materials
- Colored paper
- Scissors
- Glue
- Marker
How to make it
- Cut a large oval for the body and a triangle for the tail.
- Glue the tail behind the body and add two small fins.
- Cut colorful circles or semicircles and overlap them across the body to make scales.
- Add an eye and draw a mouth.
Cut-paper rabbit with carrot
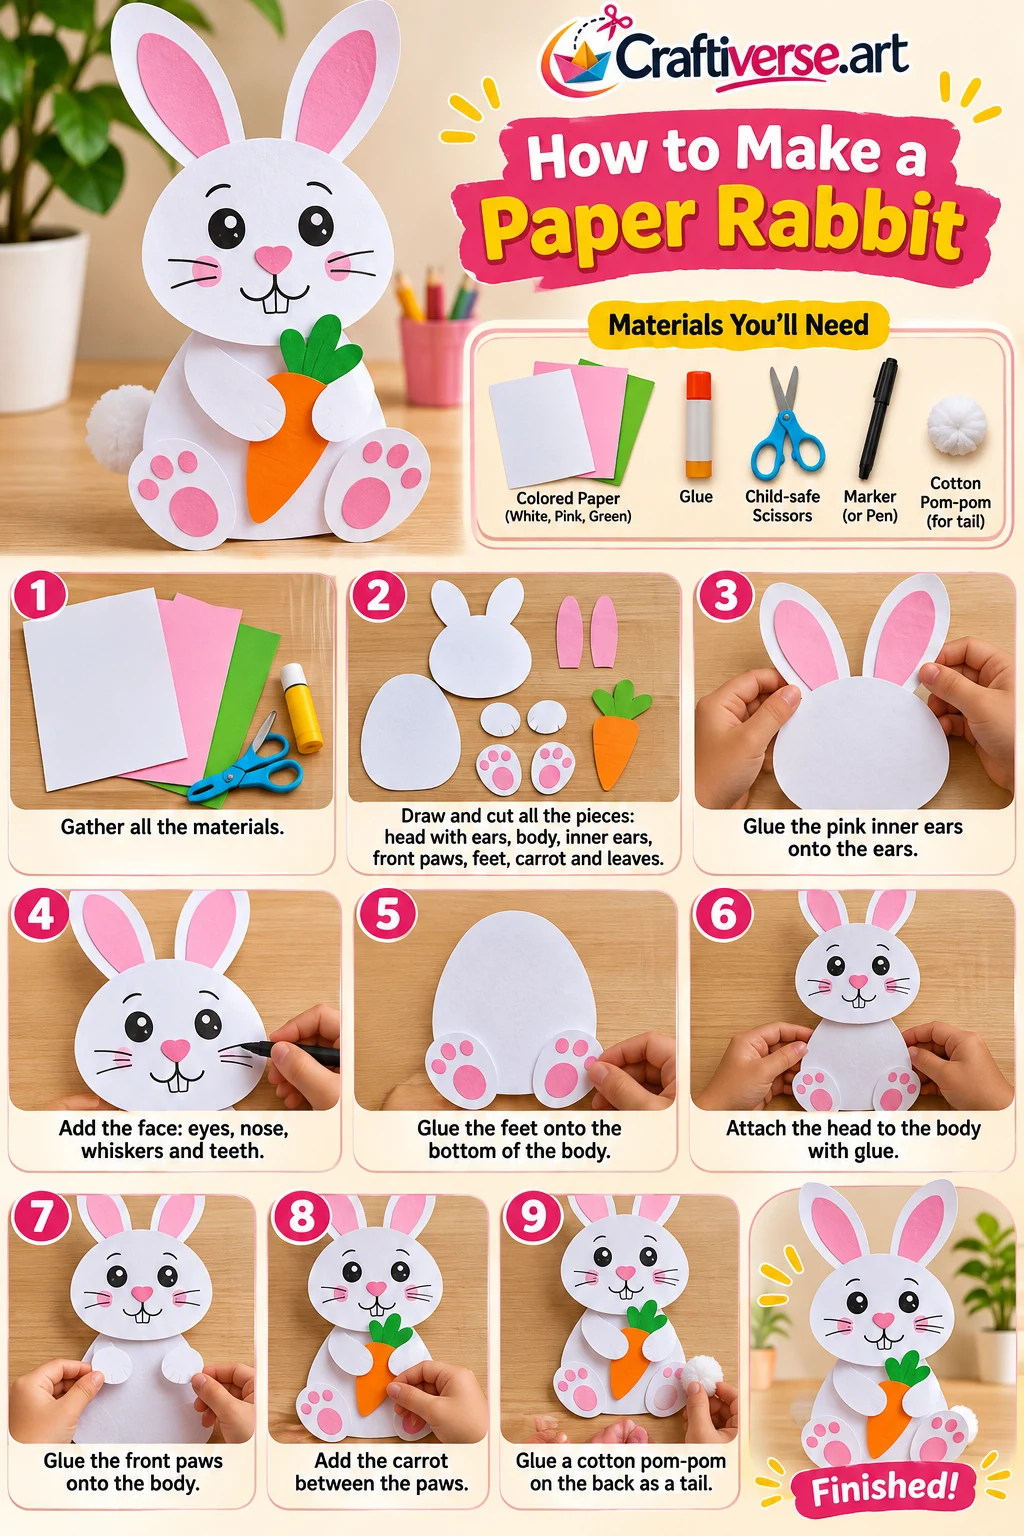
Materials
- White, pink, green and orange paper
- Scissors
- Glue
- Marker
How to make it
- Cut a white body and head and glue them together.
- Cut ears, arms and feet and add smaller pink shapes inside the ears and on the paws.
- Glue the pieces onto the body and draw the face.
- Cut and glue on an orange carrot with green leaves.
Cut-paper owl
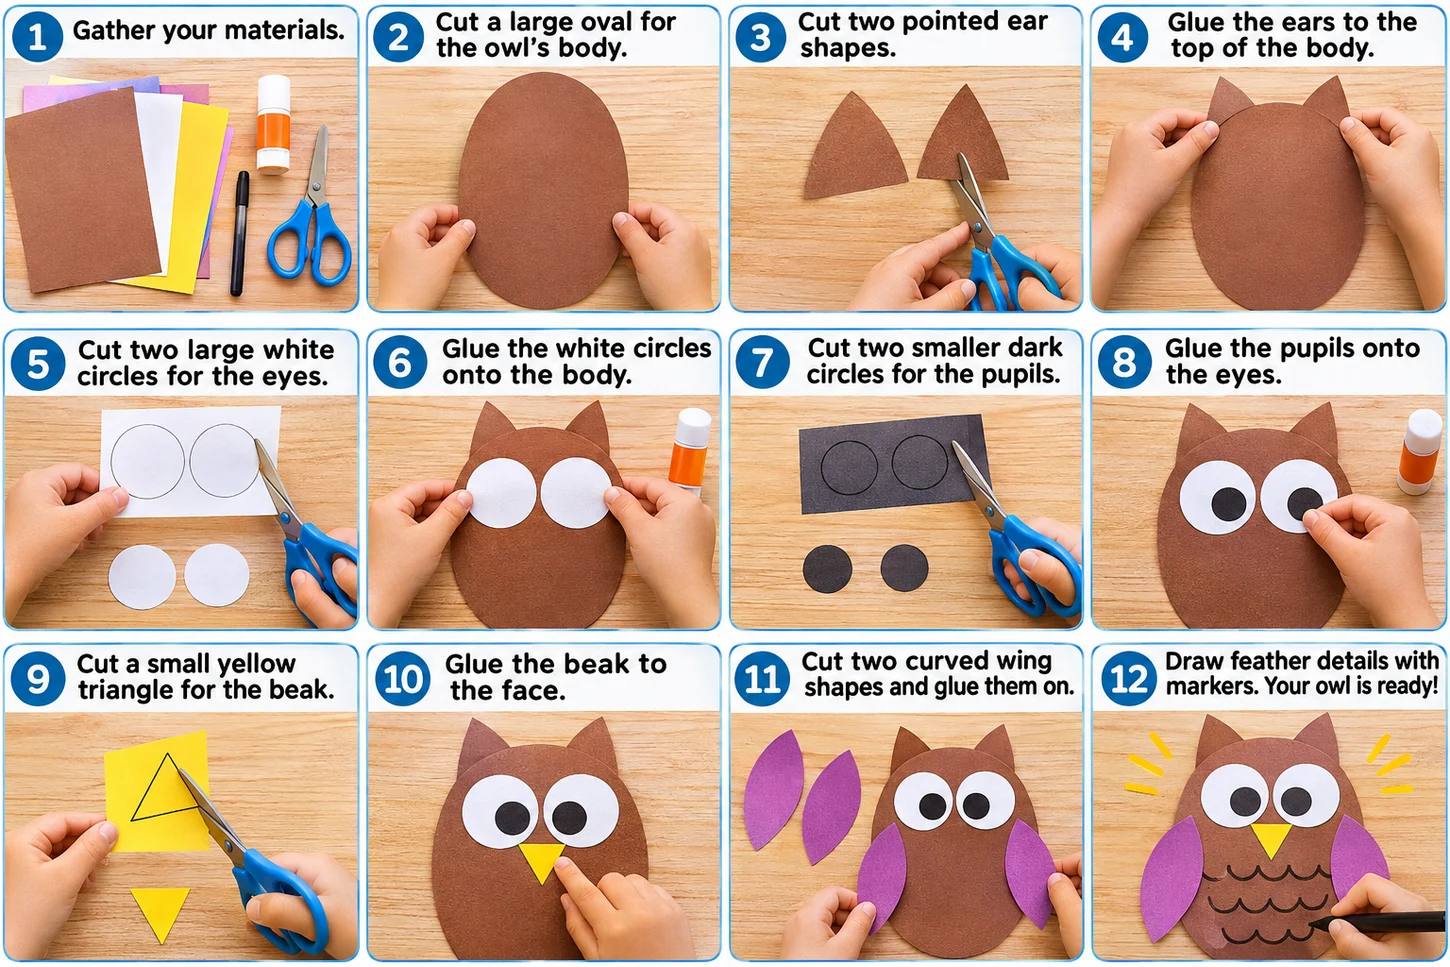
Materials
- Brown, white, yellow and colored paper
- Scissors
- Glue
- Marker
How to make it
- Cut an oval body and two pointed ears from brown paper.
- Glue the ears behind the top edge, then add two big white eyes with dark pupils.
- Cut a small yellow triangle for the beak and glue it between the eyes.
- Add two paper wings and draw feathers.
Looped paper butterfly
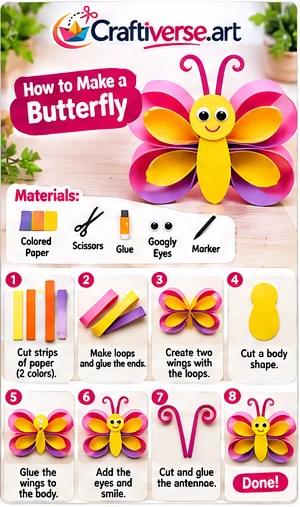
Materials
- Colored paper
- Scissors
- Glue
- Marker
How to make it
- Cut strips in two colors and glue the ends of each strip together into a loop.
- Nest a smaller loop inside a larger one to form each wing.
- Cut a paper body and glue two wings on either side.
- Add eyes, a smile and two curled antennae.
Standing paper dog
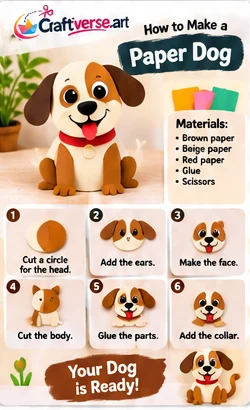
Materials
- Brown, cream and red paper
- Scissors
- Glue
- Marker
How to make it
- Cut a round head and two floppy ears.
- Glue the ears and a cream muzzle to the head. Draw the eyes and nose.
- Cut a body and fold a small base so it can stand.
- Add paws, a tail and a red collar, then attach the head.
Turn making into play without adding another big project
A finished animal can be a character rather than something that only goes on display. After the glue has set, ask whether your child wants to play, tell a story, or save the craft. Do not assume that every maker wants a performance. Quietly arranging animals in a scene is a valid way to join in.
The tutorials above use paper with ordinary tools and adhesives where listed. Check the actual supply list for the animal you choose. Draw eyes instead of using small loose decorations when those are unsuitable. Adults can prepare tricky shapes, and every child can decide how their character looks.
Use three story ingredients
Start with a character, a place, and one small problem. For example: the fish lives in a pond and wants to deliver a message. Ask one question at a time. “Where is it going?” is often enough to begin; you do not need to teach a formal story structure.
A helper or solution can appear later. If your child chooses a silly ending, let it be silly. If they want to retell a familiar story with their new animal, that works too. Keep the invitation about play rather than testing vocabulary or memory.
Three ways to play together
- One sentence each: take turns adding a short sentence. A child can pass, point, or move a character instead of speaking.
- Choose the path: draw two routes on paper and decide what the animal finds along each. Change the destination next time.
- Puppet interview: ask the character what it likes, where it lives, or what it would pack for a trip. The maker decides the answers.
Adapt for different interests and abilities
A child who wants movement can move the animal between large paper places. A child who prefers drawing can add the scenery. A child who enjoys words can write signs or speech bubbles. Offer these as alternatives, not an age ladder every child is supposed to climb.
When siblings join, keep each person’s character under their control. Ask before borrowing it or changing its story. They can share a setting while telling separate adventures. Stop if the shared game becomes frustrating and leave the animals available for later.
Make a tiny stage, or skip the stage
Fold a sheet into a shallow backdrop and draw a setting on it. Flat paper circles can stand for a pond, meadow, or house. Keep the setup on a stable surface, away from drinks, and let glued pieces set before handling.
The story cards are a second option when nobody wants to draw scenery. Print them, read a prompt aloud, and choose one to use. You can write your own character or problem in the blank space; you do not need to cut the sheet apart.
Finish with a choice
Ask whether to save the scene, put the animals away, or change the ending next time. A folder works for flat pieces; a shallow box can protect standing characters. Let your child choose what is worth keeping within the space you have.
You do not need to film or share the story for the activity to count. Enjoy the conversation and the ordinary, funny ideas that appear along the way.
Common questions
Do we need to make every animal?
No. Start with one tutorial and add another character only if it helps the play.
Are these paper-only projects?
The main craft material is paper, but scissors, glue, and markers are needed for most of the listed tutorials. Check each materials list.
What if my child does not want to tell a story aloud?
Let them arrange, move, or draw the scene, or narrate only if they invite you. A spoken performance is optional.
Sources & editorial notes
The resources below inform the general approach. The activity instructions, sample words, and planning tables are original Craftiverse suggestions; they have not been clinically evaluated.
- NAEYC: Encouraging Process Art at Home
Background on exploring materials and helping children work through a creative problem. The examples here are original practical suggestions.
Written by the Craftiverse Editorial Team · Published 21 November 2026. This article has not been reviewed by a clinician. Read our about page or contact us about a correction.
Explore more free illustrated crafts