What Can We Make With This? 10 Crafts From Everyday Supplies
· Craftiverse activity notes
Start with the supply you have at home, then choose a project with a materials list and written instructions.
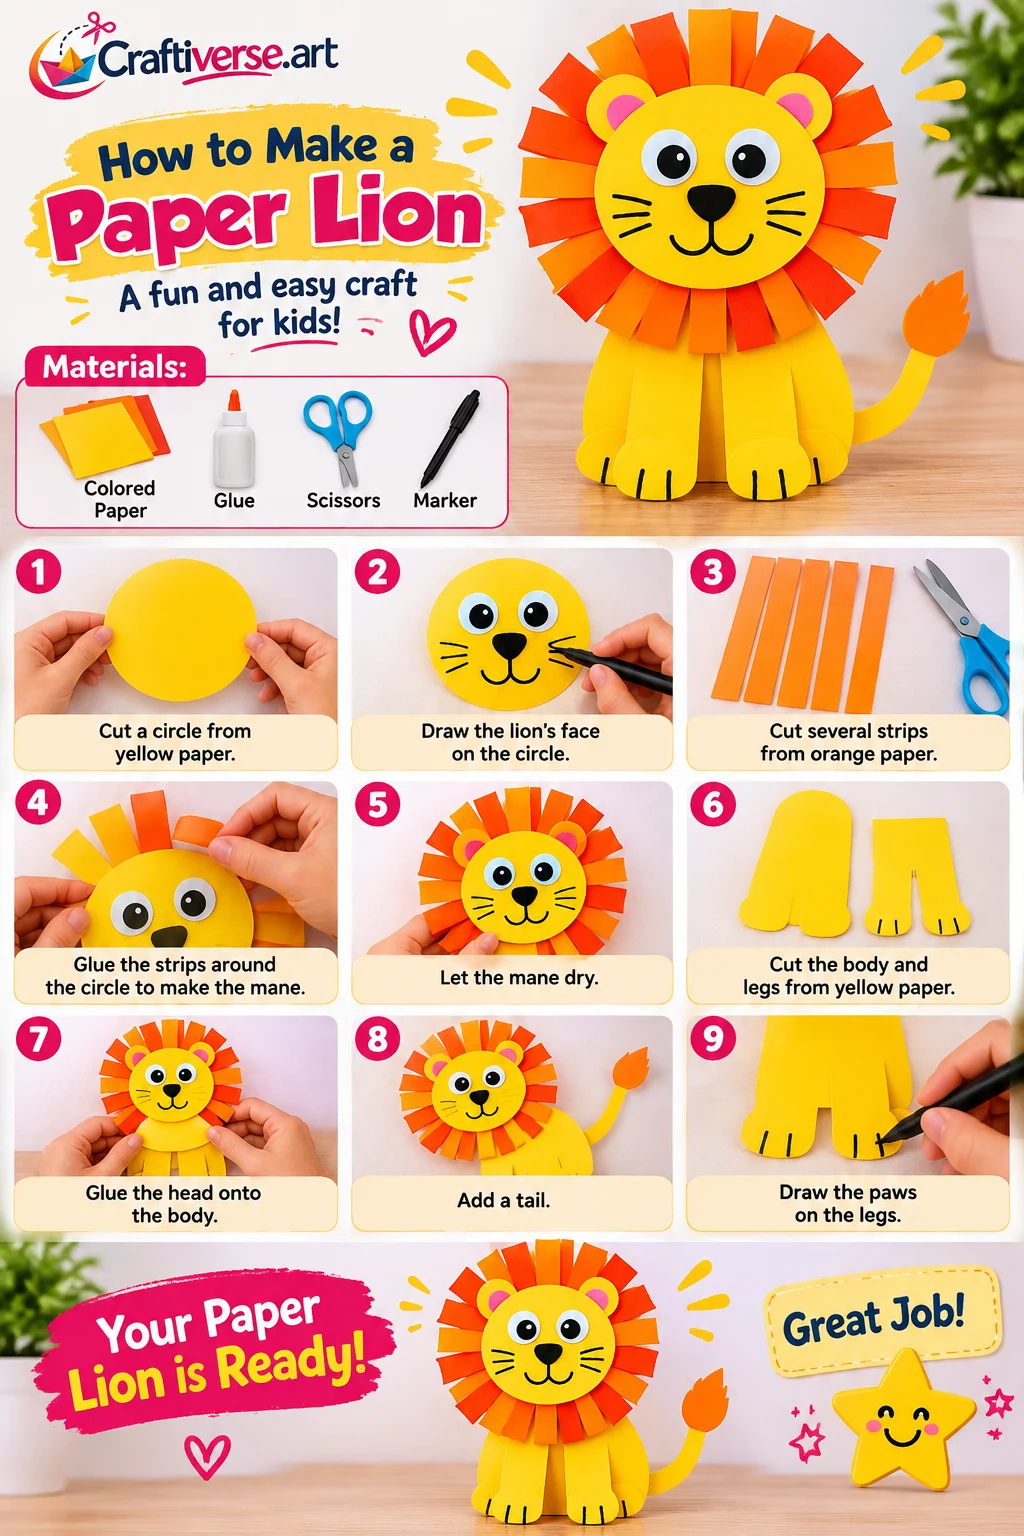
Cardboard tube lion
4 written steps · Allow about 20 minutes as a planning estimate; extra time may be needed for decorating or drying.
Materials
Cardboard tube
Yellow, orange and brown paper
Glue
Scissors
Marker
How to make it
Wrap the tube in yellow paper.
Cut a yellow face and fringe orange strips for the mane. Glue the fringe behind the face.
Add ears and draw the eyes, nose and whiskers.
Glue the head to the tube and add paper paws and a tail.
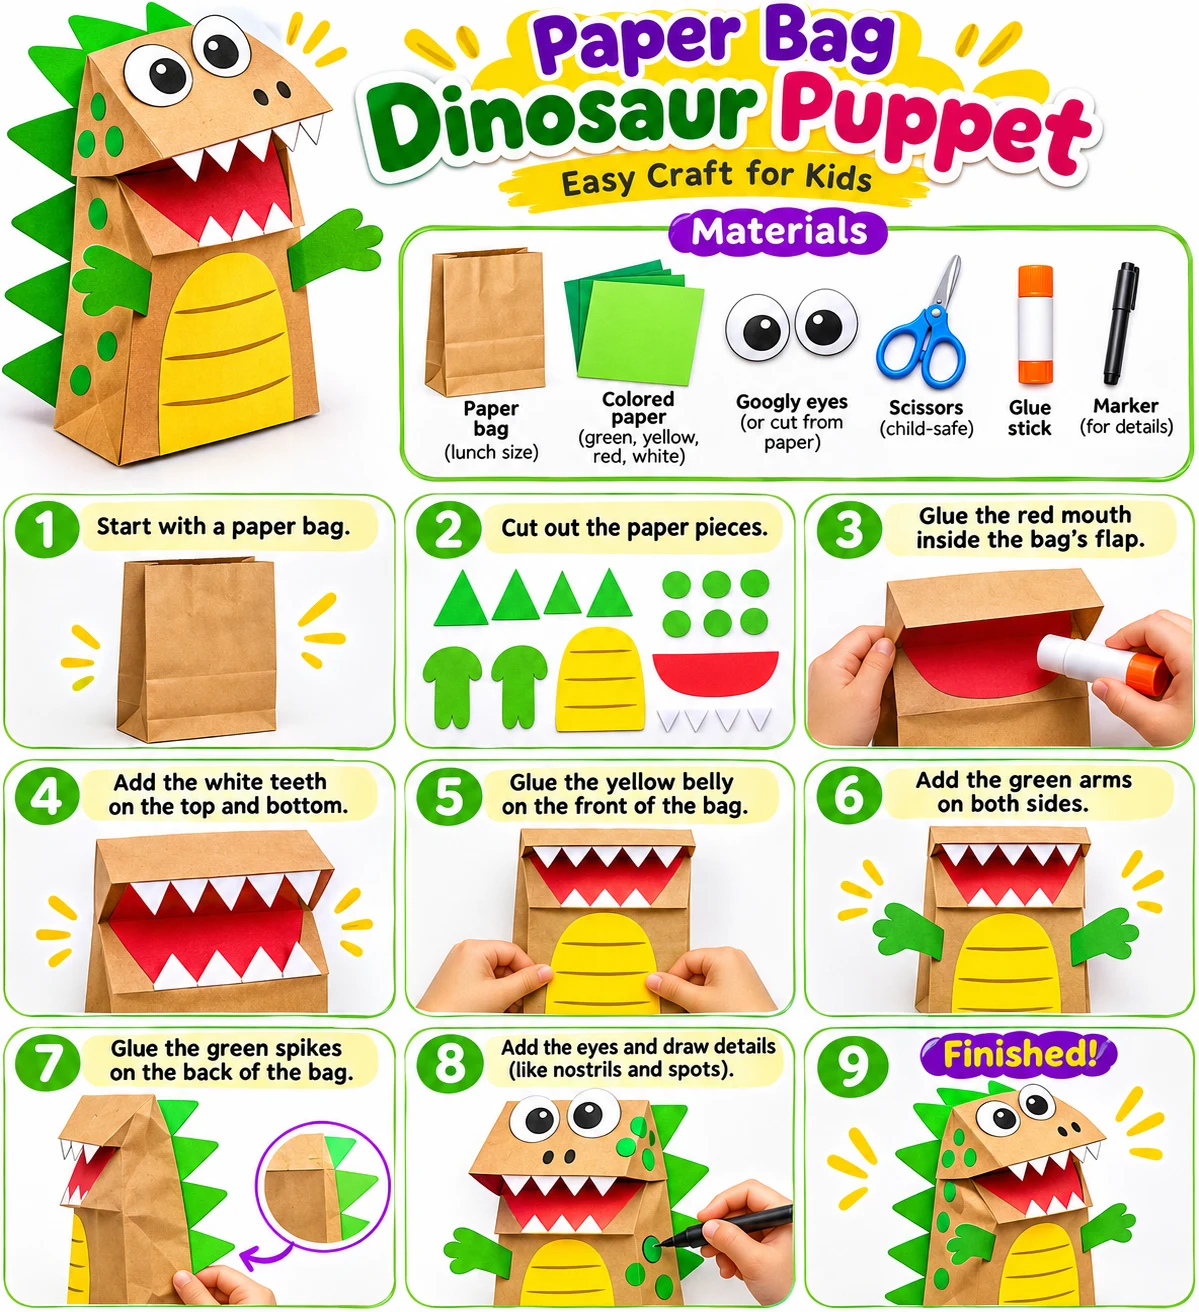
Paper bag dinosaur puppet
5 written steps · Allow about 25 minutes as a planning estimate; extra time may be needed for decorating or drying.
Materials
Paper lunch bag
Green, yellow, red and white paper
Paper eyes or googly eyes
Child-safe scissors
Glue stick
Marker
How to make it
Lay the bag flat with its bottom flap facing you. The flap becomes the movable jaw.
Cut out a red mouth, white triangle teeth, a yellow belly, green arms and green spikes.
Glue the red mouth under the flap. Glue teeth along the edges, keeping the flap free to move.
Glue on the belly and arms. Attach the spikes along one side of the back.
Add eyes and draw nostrils and spots. Slip your hand inside the bag to move the jaw.
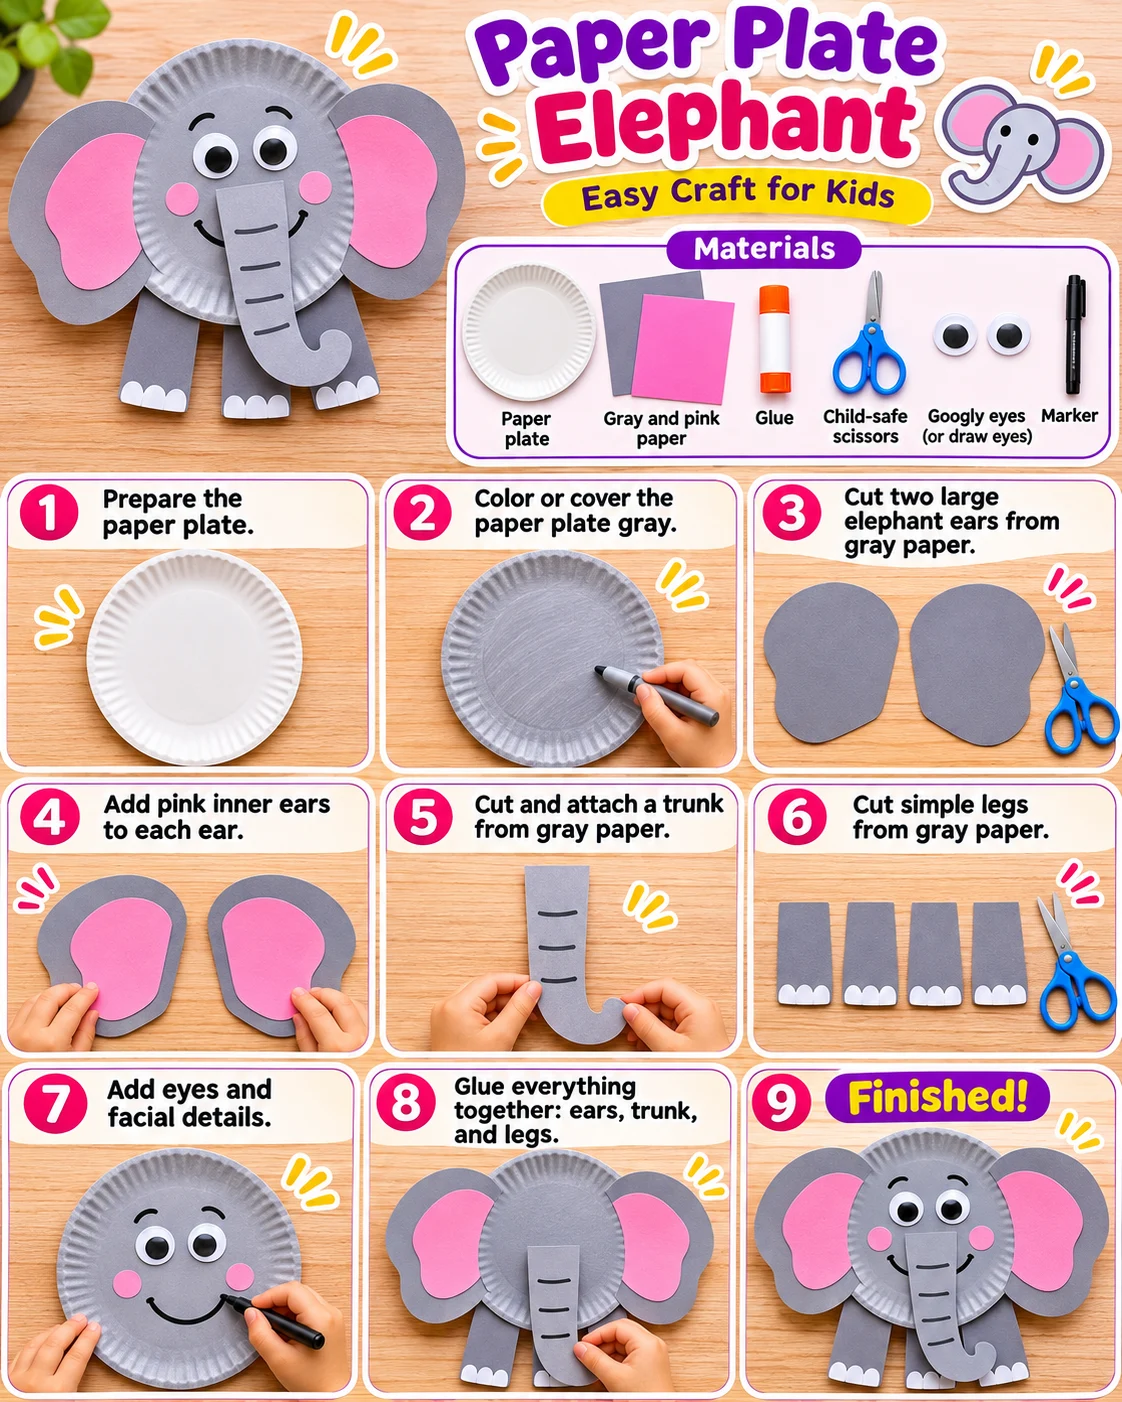
Paper plate elephant
4 written steps · Allow about 20 minutes as a planning estimate; extra time may be needed for decorating or drying.
Materials
Paper plate
Gray, pink and white paper
Scissors
Glue
Marker
How to make it
Cover a plate with gray paper.
Cut two large gray ears and two smaller pink inner ears.
Glue the ears behind the plate and attach a curled paper trunk.
Add eyes and draw the face details.
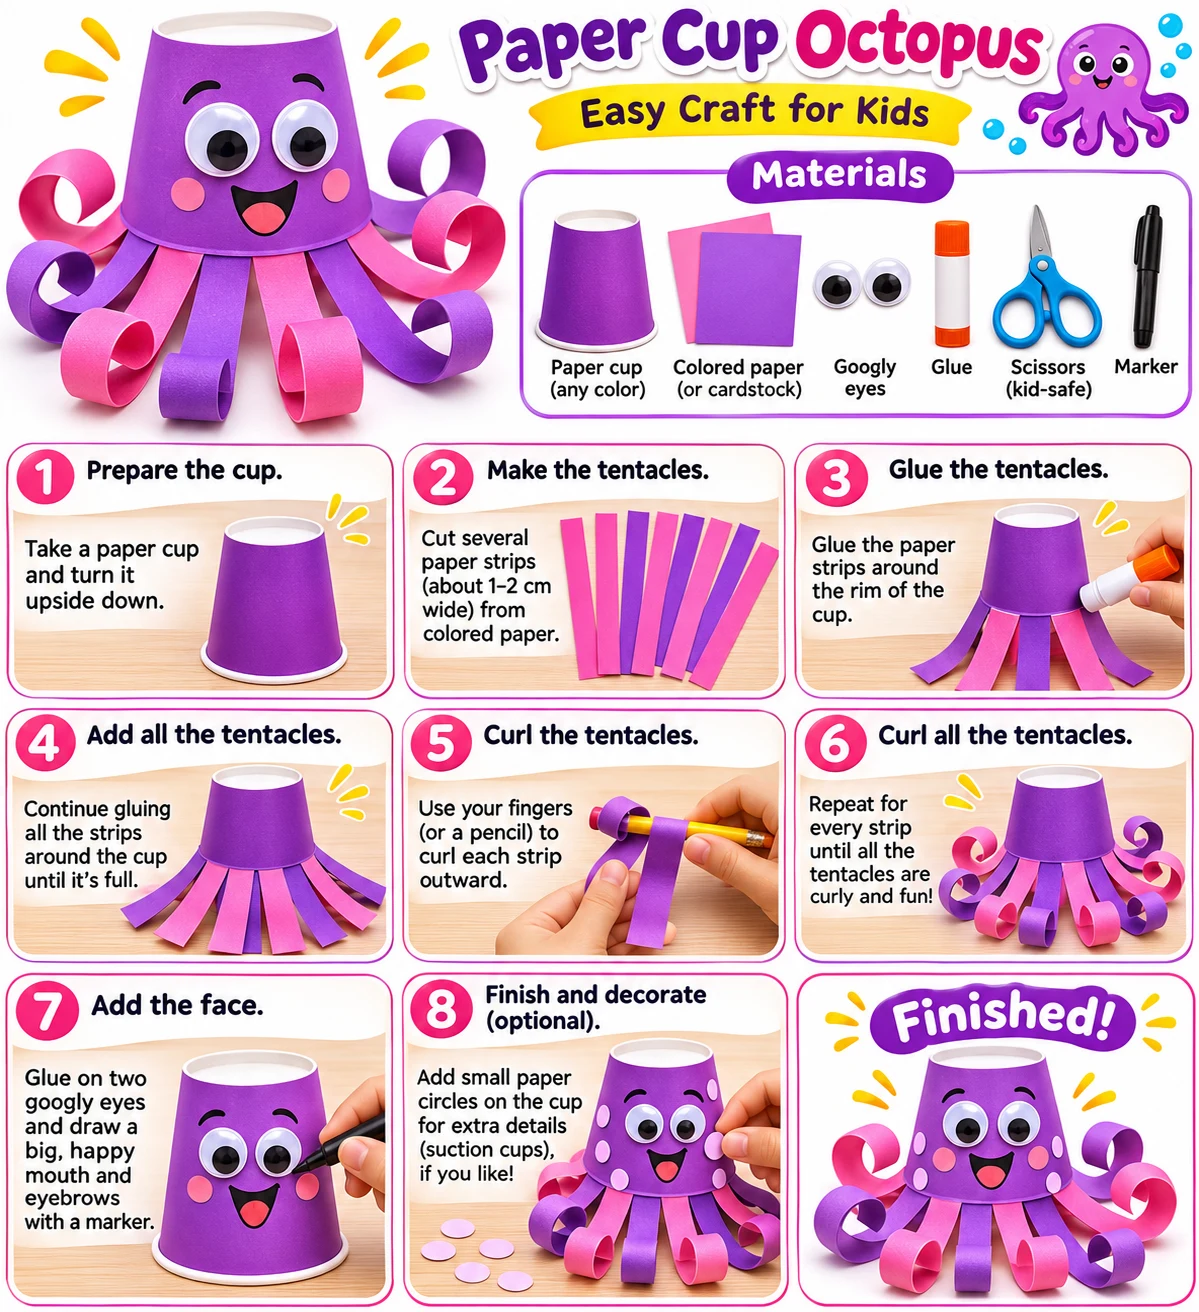
Paper cup octopus
5 written steps · Allow about 20 minutes as a planning estimate; extra time may be needed for decorating or drying.
Materials
Paper cup
Colored paper
Paper eyes or googly eyes
Glue stick
Child-safe scissors
Marker
Pencil for curling
How to make it
Turn the paper cup upside down so the open rim rests on the table.
Cut eight strips of colored paper about 1–2 cm wide.
Glue one end of each strip around the bottom rim, leaving the ends free.
Curl each strip outward around a pencil.
Glue on the eyes and draw a face. Add little paper circles for decoration if you like.
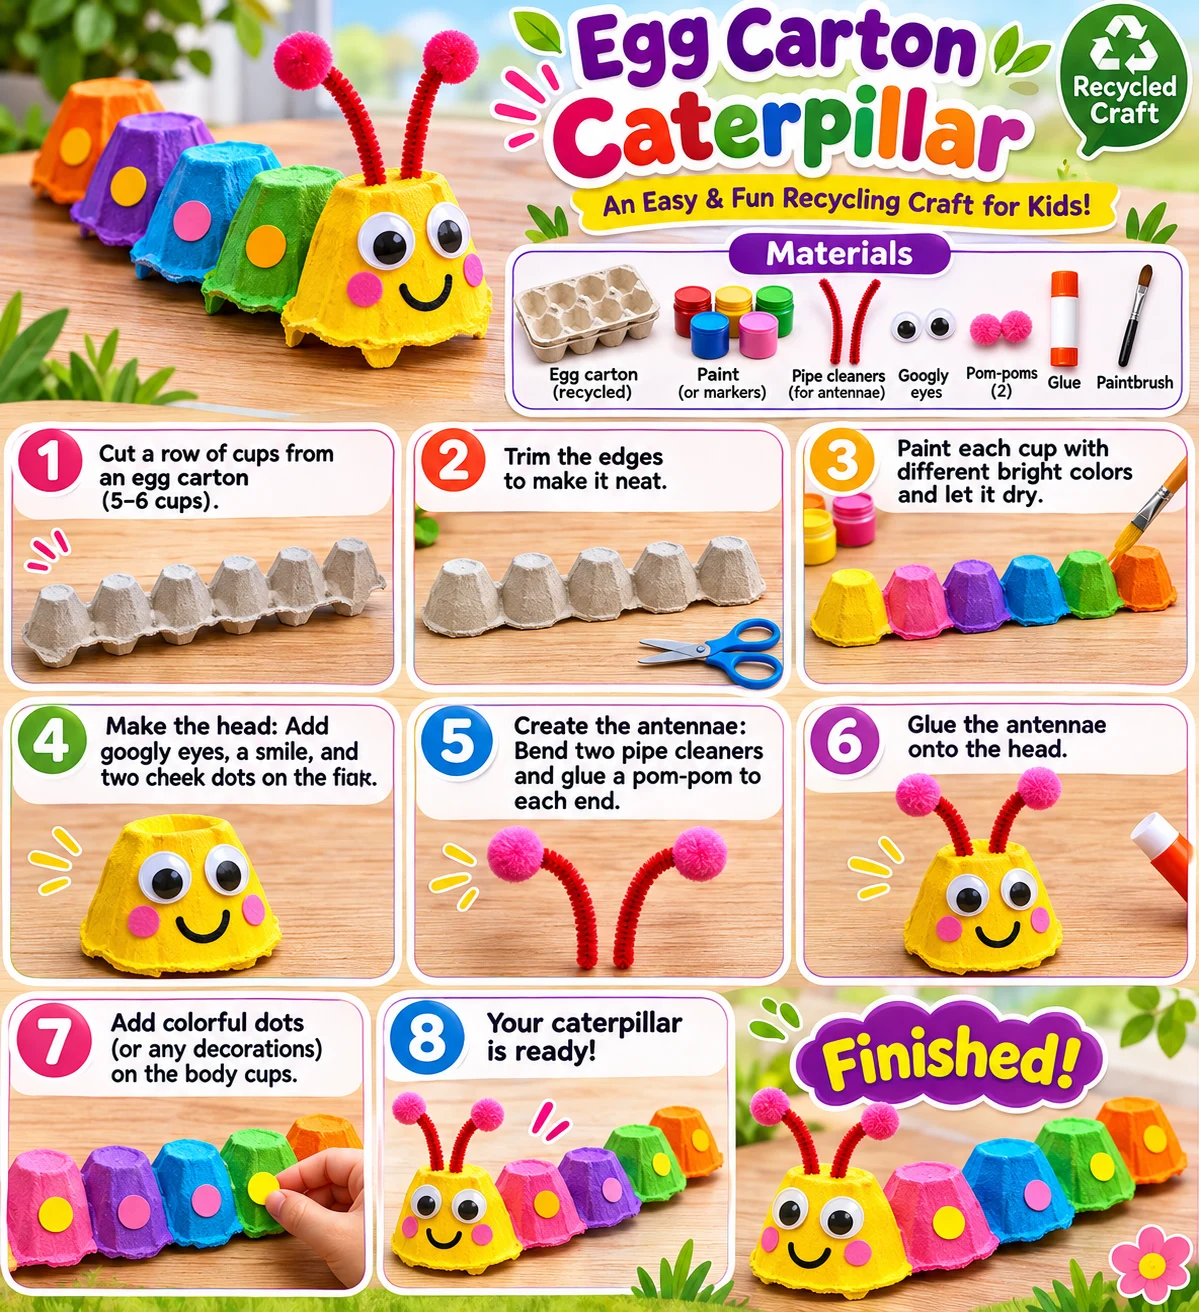
Egg carton caterpillar
4 written steps · Allow about 25 minutes as a planning estimate; extra time may be needed for decorating or drying.
Materials
Clean cardboard egg carton
Paint or markers
Paper eyes
Scissors
Glue
Pipe cleaners or paper strips
How to make it
Ask a grown-up to cut a row of cups from a clean cardboard egg carton.
Paint each cup a different color and let it dry.
Add a face to the first cup.
Glue on two curled paper strips or pipe cleaners as antennae.
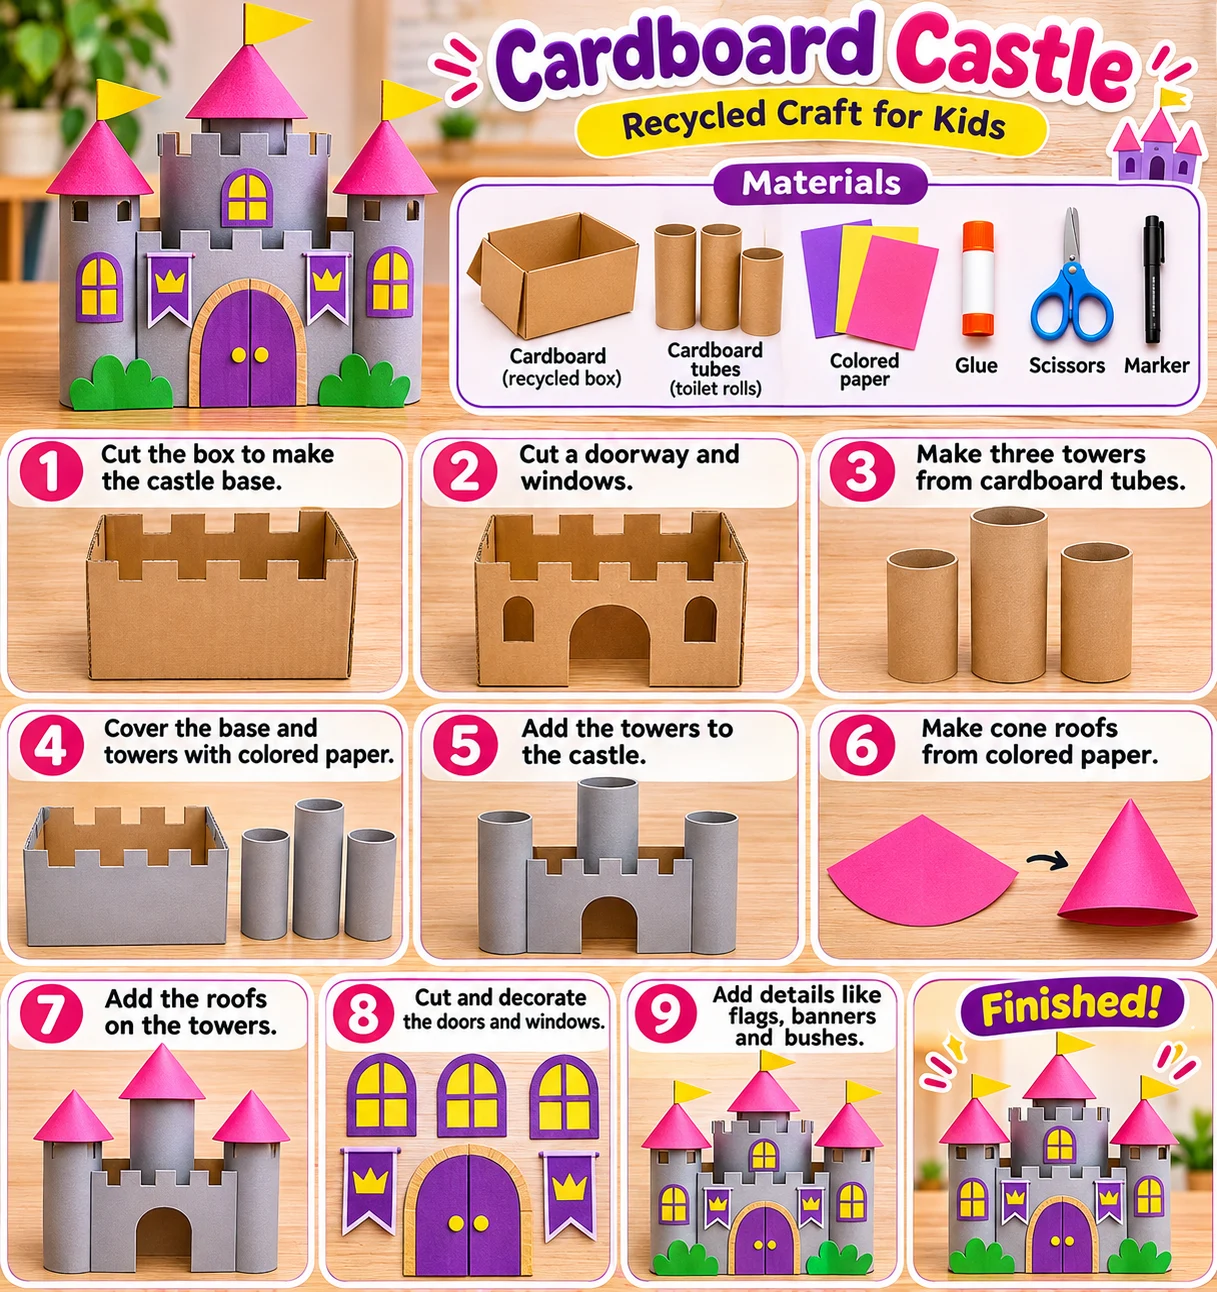
Cardboard box castle with towers
4 written steps · Allow about 30 minutes as a planning estimate; extra time may be needed for decorating or drying.
Materials
Small cardboard boxes
Cardboard tubes
Colored paper
Scissors
Glue
Marker
How to make it
Ask a grown-up to cut door and window openings in the castle base.
Cover the box and tubes in colored paper.
Glue the tubes around the base, then add rolled paper cones as roofs.
Add doors, windows, flags and other decorations.
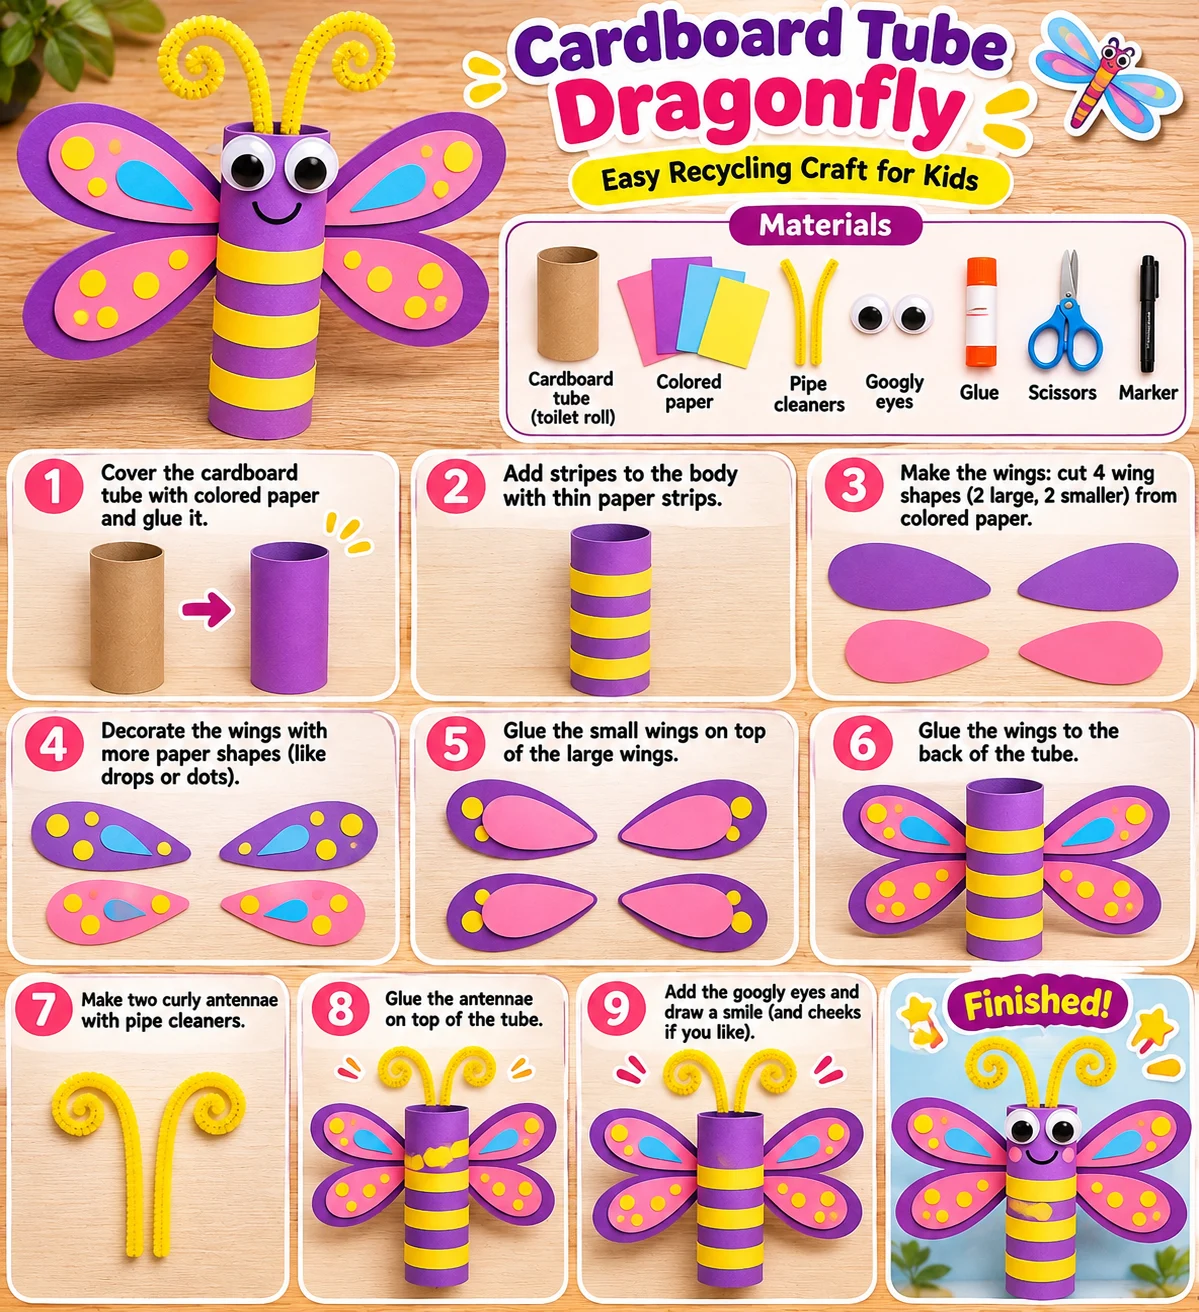
Cardboard tube dragonfly
4 written steps · Allow about 20 minutes as a planning estimate; extra time may be needed for decorating or drying.
Materials
Cardboard tube
Colored paper
Scissors
Glue
Marker
Pipe cleaners or paper strips
How to make it
Cover the tube with colored paper and add stripes.
Cut four wing shapes and decorate them with paper circles.
Glue the wings to the back of the tube.
Add eyes, a smile and two curled antennae.
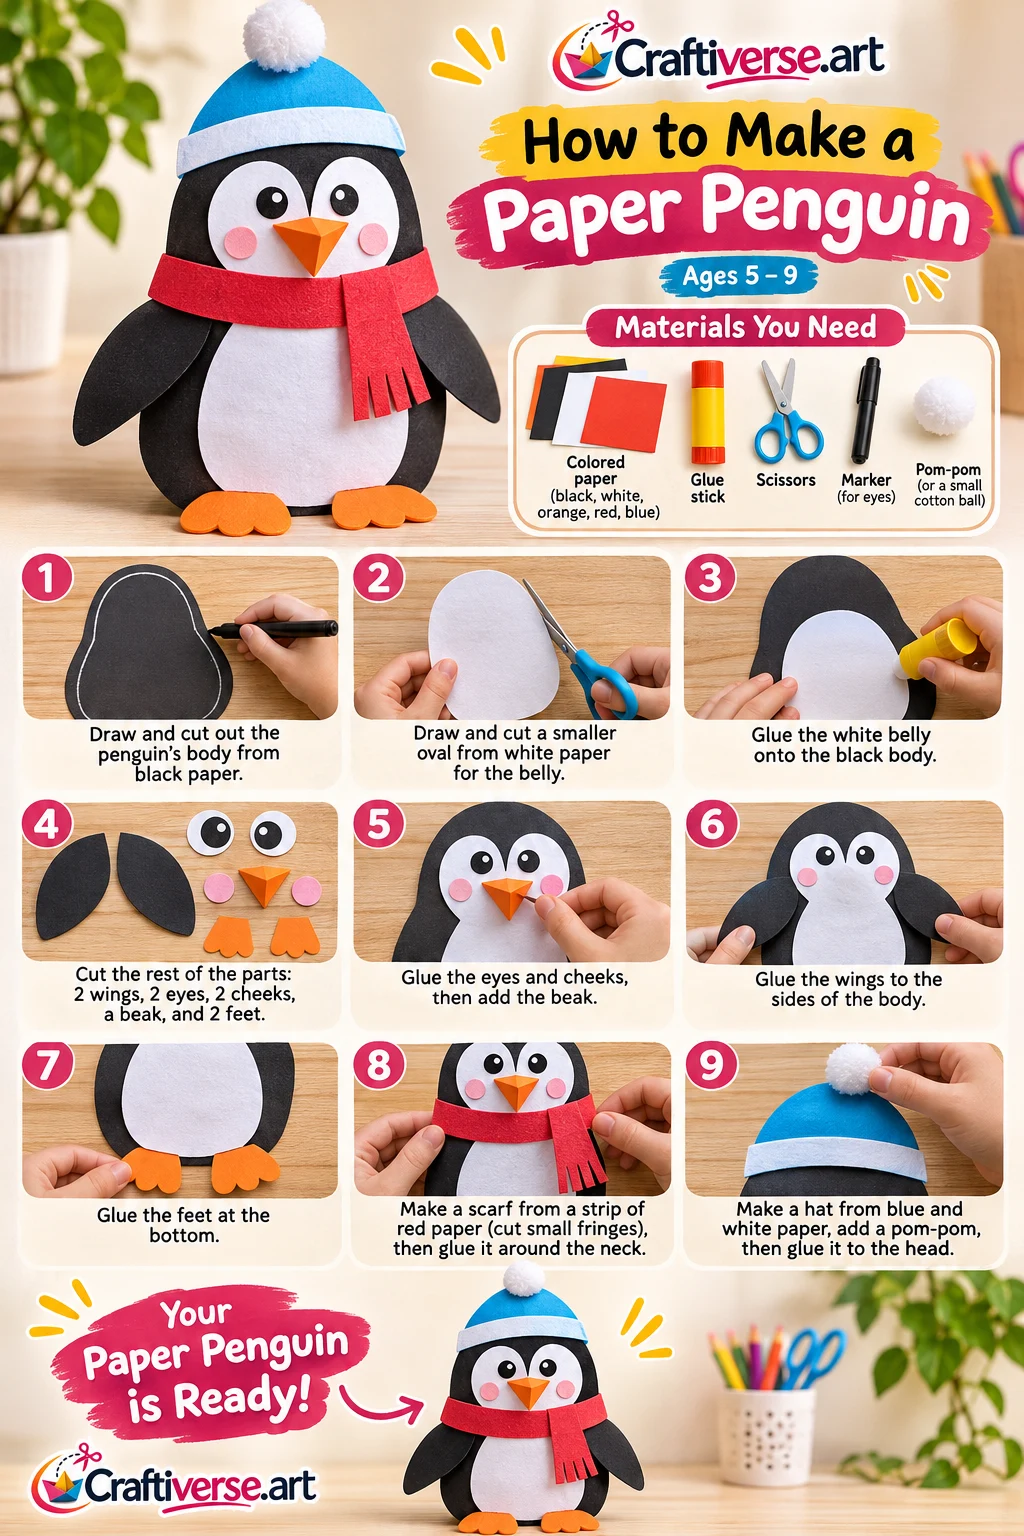
Cut-paper penguin
4 written steps · Allow about 15 minutes as a planning estimate; extra time may be needed for decorating or drying.
Materials
Black, white, orange and colored paper
Scissors
Glue
Marker
How to make it
Cut a black body and wings and a white oval belly.
Glue the belly and wings to the body.
Cut and attach an orange beak and feet and add paper eyes.
Add a paper scarf and hat.
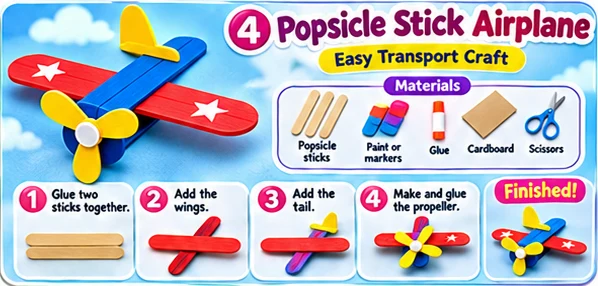
Craft stick airplane
4 written steps · Make at your own pace; a completion time has not been verified.
Materials
Craft sticks
Paint or markers
Cardboard
Scissors
Glue
How to make it
Color the craft sticks and let them dry.
Glue two sticks together lengthwise to form the body.
Glue a stick across the body for the wings and a shorter piece near the back for the tail.
Cut a cardboard propeller and glue it to the nose.
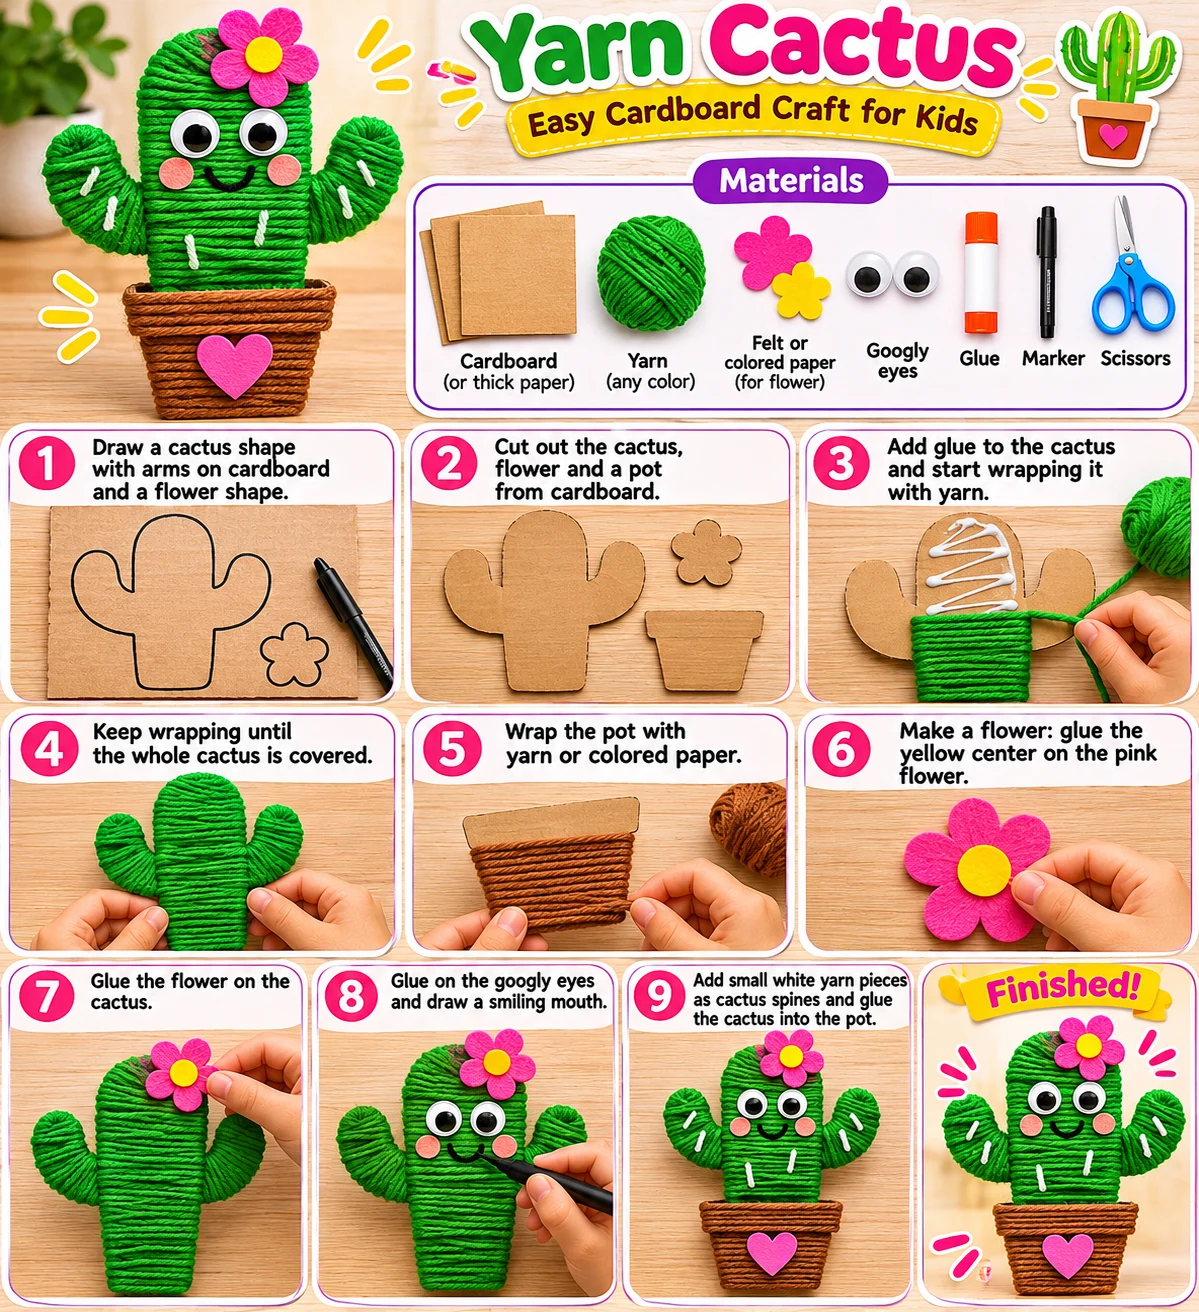
Yarn-wrapped cardboard cactus
4 written steps · Make at your own pace; a completion time has not been verified.
Materials
Cardboard
Green yarn
Colored paper
Scissors
Glue
Marker
How to make it
Draw a cactus silhouette and a flowerpot on cardboard. Ask an adult to help cut them out.
Glue the yarn end behind the cactus and wrap until the cardboard is covered.
Glue the loose end behind the cactus. Cover the pot with colored paper and attach it.
Add a paper flower and draw or glue on a face.
Start with one object
Pick a single item, like a cup or a plate, and check its project’s full supply list. Save the other projects for another day. The free finder can help if you have a different combination of supplies.